- Kenmore refrigerator water filters
- Whirlpool refrigerator water filters
- Samsung refrigerator water filters
- GE refrigerator water filters
- LG refrigerator water filters
- Frigidaire refrigerator water filters
- KitchenAid refrigerator water filters
- Maytag refrigerator water filters
- Kenmore Elite refrigerator water filters
- Estate refrigerator water filters
- GE Profile refrigerator water filters
- Amana refrigerator water filters
- Bosch refrigerator water filters
- Dacor refrigerator water filters
- Electrolux refrigerator water filters
CONFIRM THE PART FITS
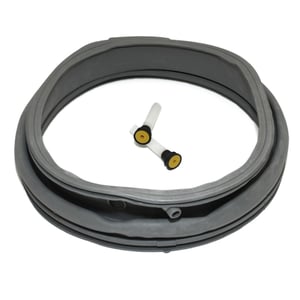
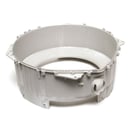
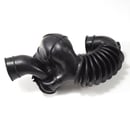
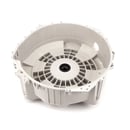
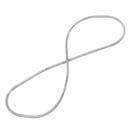
Washer Door Boot Kit (replaces 134365200, 134551400, 134740900, 134741400) 134515300
Part #134515300
Online Only Price
$245.52 |
5% OFF Phone Price : $257.52
In Stock
For ZIP codes near Edit
This part fits
Previous part numbers
Part #5304450475
Part #134741400
Part #134551400
Part #134365200
Part #P134551400
Part Information
Washer door boot kit 134515300 is an original equipment manufacturer (OEM) part that fits some front-load washers in these series: Kenmore 417; Frigidaire BLTF, FTF, FWF, FAF, GLTF, LTF, ATF and BAFWs; and Crosley BT and CFWs.
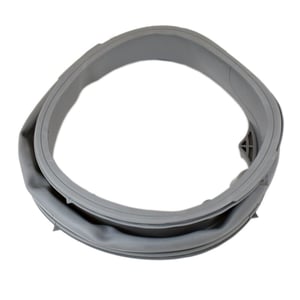
Door boot 134515300 forms a seal between the wash tub and the door, preventing leaks.
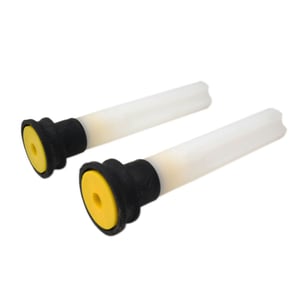
This door boot kit contains the door boot, 2 spacers and the instruction sheet.
Replaces original front load washer door boot parts 134365200, 134551400, 134740900, 134741400 and 5304450475.
Frequently Used Together
- $36.25 |14% OFF Phone Price : $42.25
- $358.95 |$12.00 OFF Phone Price : $370.95
- $68.88 |8% OFF Phone Price : $74.88
- $456.87 |$12.00 OFF Phone Price : $468.87
- $50.77 |11% OFF Phone Price : $56.77
- $130.45 |8% OFF Phone Price : $142.45
- $80.82 |7% OFF Phone Price : $86.82
- $18.59 |10% OFF Phone Price : $20.59
- $52.10 |10% OFF Phone Price : $58.10
Top models using the same part
| Model Name | Model Number | Diagram Name |
|---|---|---|
| Model #LTF2940ES1 Frigidaire washer | LTF2940ES1 | Motor/tub |
| Model #FTFB4000FS1 Frigidaire washer | FTFB4000FS1 | Motor/tub |
| Model #ATF6700FE1 Frigidaire washer | ATF6700FE1 | Motor/tub |
| Model #FAFW3574KA0 Frigidaire washer | FAFW3574KA0 | Motor/tub |
| Model #ATFB6700FS0 Frigidaire washer | ATFB6700FS0 | Motor/tub |
| Model #LTF2140ES2 Frigidaire washer | LTF2140ES2 | Motor/tub |
| Model #FAFW3574KW0 Frigidaire washer | FAFW3574KW0 | Motor/tub |
| Model #BLTF2940FS0 Frigidaire washer | BLTF2940FS0 | Motor/tub |
| Model #ATF6700FS2 Frigidaire washer | ATF6700FS2 | Motor/tub |
| Model #FAFS4073NW0 Frigidaire washer | FAFS4073NW0 | Motor/tub |
Reviews
Good boot, difficult install.
The boot itself was fine. It did not leak after I installed it. The installation of the rear spring was very difficult. I watched four different youtube videos ahead of time, but the installation still took two days of intermittent work. My clothes washer was built in 2006, and no video showed my exact model. The spring was a continuous coil spring with a very high spring constant. The best tips from the videos were: use silicon spray on the boot groove use spring clamps to maintain the gain after prying each section onto the lip two pairs of hands will be needed after fitting the boot groove onto the rib, push the boot material into the drum before installing the spring. The two plastic dowels supplied to hold the spring into the groove were not enough in number and they tended to fall out as the next section of spring was forced into the groove. Spring clamps work much better. If I had to the job again, I would spend the time to make a custom tool similar to a tire iron spoon used to install a tubeless tire onto a rim. It would made of two steel pieces fastened together. The first would be 1/16 inch thick by about 1 inch wide and about 8 inches long. A second piece would be 1/4 inch thick by 1 inch wide. It would be about 1/2 inch shorter and the business end would have a large convex radius on the end, about 1 inch. The end would also have a shallow groove filed into it, to fit the spring cross section. With the pieces glued or bolted together, the 1/16 tongue would slip under the spring, and the end of the thicker plate would push the spring into position over the groove in the boot. The tool could be slid in the circumferential direction around the opening, with spring clips attached behind it to hold the spring in place as the tool advances. I had two C-clamps and borrowed four spring clamps from my son-in-law to get the job done.
Old E, Damariscotta, ME
Did you find this review helpful?
- Ease of Installation
- Very Difficult
- Duration of Installation
- More than 2 hours
Yes, I would recommend this to a friend
Correct part, tricky installation
Identifying the part for my Frigidaire washer was pretty straight-forward, and cudos to Sears Parts Direct for making it so. Also, delivery was pretty fast, too. DIY installation was definitely challenging, though. I found useful the video at https://www.youtube.com/watch?v=g7RrId7wmF8 . If you are unfamiliar with this task, like I was, it will be helpful to check out in advance a couple more related videos that can be found. Removing the old bellow was easy, as was the entire process until it was time to re-install the inner spring. I removed 1 star from the product because I found utterly useless the 2 pieces that are supposed (?) to help hold the spring in place when installing it. Instead, I went and bought a couple of clamps like the ones shown in the video, and they did the trick for me. I caution you to be very careful when installing the inner spring because you will need to stretch it at very high tensions. It took me several attempts to place it successfully, but eventually things worked out well. It also took me a couple of breaks between attempts because of the physical effort to stretch the spring and keep it stretched while trying to fit it into its place. It was the first time I ever performed this process, and it took me overall out a couple of hours to complete.
Frigidaire O, San Diego, CA
1 person thought this review was helpful.
- Ease of Installation
- Moderate
- Duration of Installation
- 1 - 2 hours
Yes, I would recommend this to a friend
Very difficult to install
You cannot use a spring tool so it is a very difficult installation.
Mark, Wisconsin
1 person thought this review was helpful.
- Ease of Installation
- Very Difficult
- Duration of Installation
- More than 2 hours
Yes, I would recommend this to a friend
Works as advertised
Took about an hour to install. Installation instructions were clear and easy to follow. It helps to have 2 sets of hands reinstalling the spring.
PeterS, Boulder colorado
1 person thought this review was helpful.
- Ease of Installation
- Difficult
- Duration of Installation
- 30 minutes - 1 hour
Yes, I would recommend this to a friend
Hard to install. But we did it.
The two spacers provided were not enough for me to complete the installation, so I went to the hardware store and bought some wooden dowels and a saw so that I could build more dowels. After three days and lots of struggling, I was able to install it.
pb79, Columbus, MS
Did you find this review helpful?
- Ease of Installation
- Very Difficult
- Duration of Installation
- More than 2 hours
Yes, I would recommend this to a friend
Perfect
Worked great. Fit perfectly. I couldn't tell any difference from the oem.
TSWebb, Undisclosed
1 person thought this review was helpful.
- Ease of Installation
- Moderate
- Duration of Installation
- 30 minutes - 1 hour
Yes, I would recommend this to a friend
Good fix
The new bellows work good but the 2 installation tools were less than no help. I tried using them like shown and had them let the spring loose at the worst time. I still have a bruise across the back of my hand from where the spring got loose and smacked me.
Fix i S, Des Moines, Washington
2 people thought this review was helpful.
- Ease of Installation
- Moderate
- Duration of Installation
- 1 - 2 hours
Yes, I would recommend this to a friend
Have patience
You will need time and patience to complete the task. I recommend a few videos for reference and some spring clamps to keep things in place.
Chefdempsey, Houston Tx
2 people thought this review was helpful.
- Ease of Installation
- Difficult
- Duration of Installation
- 1 - 2 hours
