
Frigidaire Range Surface Element Control Switch...
Part #316436001
$33.15 |
15% OFF Phone Price : $39.15
Frigidaire Range Surface Element Control Switch...
Part #316436001
Frigidaire Range Oven Temperature Sensor (repla...
Part #316490000
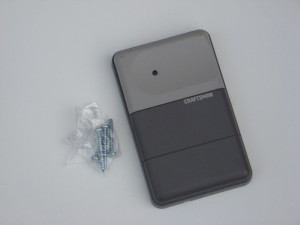
This DIY repair guide explains how to complete a Craftsman garage door opener wall control replacement. Located on the garage wall by the door to the house, the control opens and closes the garage door and turns the garage light on. If nothing happens when you push the control button, the control is most likely broken. Replace the wall control with the manufacturer-approved garage door opener part.
You can also use this Craftsman garage door opener wall control replacement procedure to replace the wall control for Chamberlain, Genie and LiftMaster garage door openers.
If you have to hold down the control button for the door to close completely, the safety sensors are the most likely problem. To replace the safety sensors, see our repair guide How to Replace a Garage Door Opener Safety Sensor.
This video explains how to replace the wall control on a garage door opener.
Use a step ladder to access the garage door opener’s power cord and motor unit.
Unplug the garage door opener.
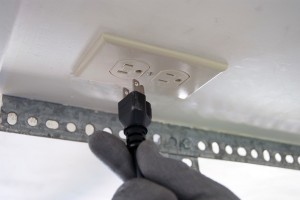
PHOTO: Unplug the garage door opener.
Push down on the control button locking tabs to release them, and then pull the control button off the old wall control.
Remove the top mounting screw.
Pull the wall control up slightly then outward to release it from the bottom mounting screw.
Loosen the wire screws and disconnect the wires from the back of the wall control.
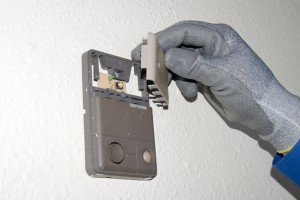
PHOTO: Pull off the control button.
Push down on the control button locking tabs to release them, and then pull the control button off the new wall control.
Connect the wires to the back of the new wall control. Attach the white wire to the terminal marked white and the red-striped wire to the terminal marked red.
Push the bottom mounting slot on the wall control onto the bottom mounting screw and slide the wall control slightly downward to lock it into the bottom screw.
Install the top mounting screw.
Reinstall the control button on the new wall control by pushing the top tabs of the control button into the top wall control slots and then snap the bottom control button tabs into the bottom wall control slots.
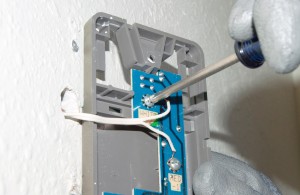
PHOTO: Reconnect the wall control wires.
Plug in the garage door opener.

Choose a symptom to see related garage door opener repairs.
Main causes: garage door opener misaligned, travel limits need adjustment, bad travel limit switches, faulty logic contr…
Main causes: garage door locked, damaged garage door tracks, up-force setting needs adjustment, RPM sensor failure, bad …
Main causes: safety sensor beams blocked, safety sensors not aligned, downforce setting needs adjustment, damaged garage…
Things to do: check garage door travel, tighten brackets and fasteners, test safety sensors, check travel limits and for…
Main causes: radio interference, weak remote batteries, sunlight interference with safety sensor beams, safety sensors n…
Main causes: faulty logic control board, bad RPM sensor, broken gears in the drive system, bad drive motor…
Main causes: neighbor's remote programmed at the same time as yours, faulty wall control wiring, bad wall control unit…
Main causes: loose fasteners, broken brackets, need preventive maintenance, worn drive gears, loose or worn belt, loose …
These step-by-step repair guides will help you safely fix what’s broken on your garage door opener.

Learn how to replace the gear and sprocket assembly on your garage door opener if the drive motor runs but the door won'…

The logic board is the brains of the garage door opener. If the remote doesn't work or the door doesn't open and close p…

If your garage door won’t move, the chain and cable assembly on your garage door opener could be broken. Follow these st…
Use the advice and tips in these articles and videos to get the most out of your garage door opener.

Learn about all the convenient features on our Sears PartsDirect website that make your parts purchases easier.…

Get answers to frequently asked questions about Sears and Sears PartsDirect.…

Learn how to repair broken, frayed or damaged wires in your appliances.…
