- Kenmore refrigerator water filters
- Whirlpool refrigerator water filters
- Samsung refrigerator water filters
- GE refrigerator water filters
- LG refrigerator water filters
- Frigidaire refrigerator water filters
- KitchenAid refrigerator water filters
- Maytag refrigerator water filters
- Kenmore Elite refrigerator water filters
- Estate refrigerator water filters
- GE Profile refrigerator water filters
- Amana refrigerator water filters
- Bosch refrigerator water filters
- Dacor refrigerator water filters
- Electrolux refrigerator water filters
How to repair broken or damaged wires video


If one of your appliances isn’t working, a broken wire may be to blame. In fact, a broken wire is a common cause of problems with appliances and lawn tractors.
Once you locate the damaged wires, there are a number of ways to repair it. The best choice depends on how much wire you have to work with and whether the wire will be exposed to heat or water.
This video from Sears PartsDirect shows how to use different connectors for your situation.
If you need help finding the broken wire, watch our series of videos about wiring schematics.
The first video in the series explains the most common symbols in a wiring schematic.
The second video describes how to read a wiring diagram.
The third video shows how to trace a circuit on a wiring diagram.
When you're troubleshooting an electrical problem, a multimeter is an essential tool. How to use a multimeter to test electrical parts video shows you how.
Tools and parts needed
Wire stripper
Heat gun or hair dryer
Crimping tool
Crimp connectors
Heat shrink tubes
Wire nuts
Silicone sealant
Strip insulation from old wire
Hi, this is Wayne with Sears Parts Direct. Today, we're going to talk about a few ways to repair a broken wire. Wires inside your appliance can be pinched, burnt, frayed or broken. You can repair damaged wires using a suitable wire connector. For safety, before performing any wire repairs, disconnect power to your appliance.
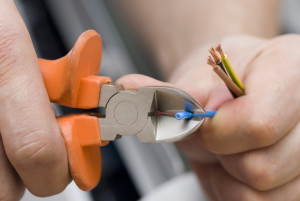
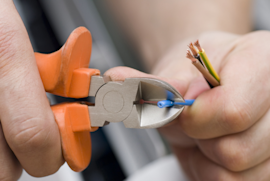
The first step in this repair is to strip the insulation from the ends of the wire. Always use a wire stripper to strip off the insulation. Using a knife or wire cutter could be unsafe and could also damage the wire strands inside the insulation.
Place one end of the wire into the correct size stripping hole. The holes are marked by wire gauges—smaller numbers denote larger wire sizes. If you use a hole that’s too small, you may pull off wire strands along with the insulation. Strip 1/4 inch of insulation off the end of the wire. Once we’ve stripped the insulation, we’re ready to fasten the wire ends together.
Best uses for crimp connectors
Crimp wire connectors can be used when space inside the appliance is limited or when you don’t have much wire slack to work with. This connector is smaller than a wire nut and doesn’t shorten the existing wire.
First, place the bare end of the wire into the connector, leaving none exposed. Repeat the process for the other wire end. Squeeze the connector firmly with a crimping tool so the crimp securely grips the wire. Give the wire connector a couple of firm 'tugs" to see that it's connected and tight.
Crimped wire connections that could be exposed to water inside an appliance require a heat shrink tube seal to protect the new connection from moisture. Always remember to put the heat shrink tubes on the wire before you crimp the wire ends together.
Cover both ends of the connector with the heat shrink tube to create a good seal. Heat the tube using a heat gun or hair dryer until the tube shrinks up and seals the crimp connector.
Working with a wire nut connector
If that seems like too much work for you, you could always use a wire nut. Wire nuts are good to use when you have plenty of wire slack and you're not restricted by wire harness space. Ceramic wire nuts with high temperature ratings should be used to connect wires in ranges and other appliances that generate heat. Wire connectors should match the temperature rating of the wires that they're connecting.
To apply a wire nut, place it over the stripped wire ends until it covers all of the bare wire. Slowly twist the wire nut clockwise until it’s firmly secured. Give the wires a couple of tugs to make sure it’s on tight. You don’t need to twist the wire ends together before you install the wire nut. When a wire nut is used to connect wires exposed to moisture, seal the open end of the wire nut with silicone.
Replacing a broken spade connector
To repair a wire with a broken spade connector, cut off the existing connector and strip 1/4 inch of insulation from the wire end. Put the new connector onto the end of the wire and use a crimping tool to secure it to the wire. Give the wire connector a couple of firm “tugs" to see that it's connected and tight. Always check the continuity of the wire you repaired before reassembling the appliance.
Well, I hope this video has helped you out today. If you liked it, you can subscribe to our YouTube Channel and check out our other videos we have.
Most common symptoms to help you fix your cooktops
Choose a symptom to see related cooktop repairs.
Main causes: lack of electrical power, gas supply failure, bad pressure regulator, control system failure…
Most common repair guides to help fix your cooktops
Effective articles & videos to help repair your cooktops
Use the advice and tips in these articles and videos to get the most out of your cooktop.

Get tips on completing essential holiday cleaning tasks to brighten your home.…

Learn how to repair broken, frayed or damaged wires in your appliances.…

These common questions can help you make the most of your cooktop.…

