- Kenmore refrigerator water filters
- Whirlpool refrigerator water filters
- Samsung refrigerator water filters
- GE refrigerator water filters
- LG refrigerator water filters
- Frigidaire refrigerator water filters
- KitchenAid refrigerator water filters
- Maytag refrigerator water filters
- Kenmore Elite refrigerator water filters
- Estate refrigerator water filters
- GE Profile refrigerator water filters
- Amana refrigerator water filters
- Bosch refrigerator water filters
- Dacor refrigerator water filters
- Electrolux refrigerator water filters
How to replace a freezer lid gasket
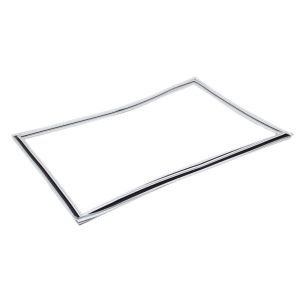
This DIY repair guide explains how to replace the lid gasket on a freezer. The lid gasket keeps warm, moist air out of the freezer. If the lid gasket is torn or damaged, thick frost forms on the food and inner freezer walls. Replace a damaged or torn lid gasket with the manufacturer-approved freezer part.
These steps show how to replace the lid gasket on Kenmore, Frigidaire, Gibson, Crosley, White-Westinghouse and Kelvinator chest freezers.
Quick links
Instructions
Tools required
Slot screwdriver
Phillips screwdriver
Petroleum jelly
Repair difficulty
Time required
30 minutes or less
Repair difficulty
Time required
30 minutes or less
Instructions
- 01.
Shut off the power
Unplug the freezer or shut off the circuit breaker for the freezer. Safely store any food that could deteriorate while the freezer is shut off for this repair.
Tip: Soak the new gasket in warm water to smooth out the creases created during shipment. You can also use a heat gun or hair dryer on a low heat setting to remove creases in the gasket. - 02.
Remove the lid gasket
Raise the freezer lid.
Fold the inside lip of the gasket back to access the screws and clips that secure the gasket to the freezer lid.
Remove the screws from the gasket.
Use a slot screwdriver to pry the plastic clips out of the gasket.
Pull the gasket and inner lid liner off of the outer lid panel.
Remove the gasket from the inner lid liner.
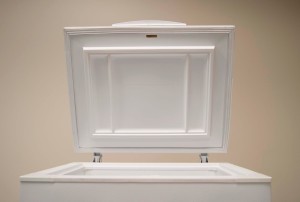
PHOTO: Raise the freezer lid.
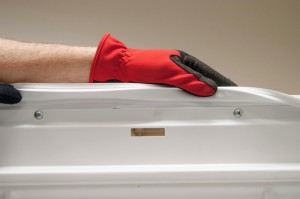
PHOTO: Fold the lid gasket back to access the screws.
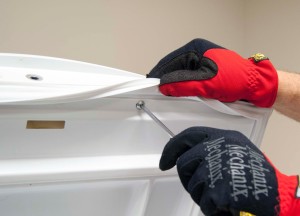
PHOTO: Remove the screws.
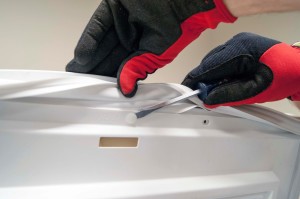
PHOTO: Pry out the gasket clips.
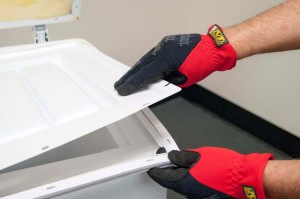
PHOTO: Remove the lid gasket.
- 03.
Install the new lid gasket
Position the new gasket around the inner lid liner.
Position the inner lid liner and the gasket on the outer lid panel and line up the mounting holes.
Reinstall the screws and clips to secure the new gasket and inner lid liner to the outer lid panel.
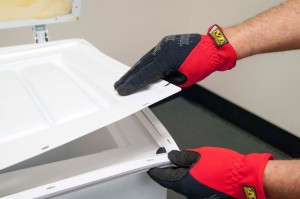
PHOTO: Install the lid gasket.
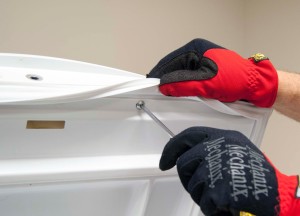
PHOTO: Reinstall the gasket screws.
- 04.
Check the new lid gasket for a proper seal
Lower the lid and check the new gasket for a proper seal. You should not see any gaps between the lid gasket and the top edge of the freezer cabinet when the lid is shut.
- 05.
Lubricate the new lid gasket
Coat the new lid gasket lightly with petroleum jelly, which helps the lid close smoothly and protects the lid gasket from wear.
Warning: Undertaking repairs to appliances can be hazardous. Use the proper tools and safety equipment noted in the guide and follow all instructions. Do not proceed until you are confident that you understand all of the steps and are capable of completing the repair. Some repairs should only be performed by a qualified technician.
Most common symptoms to help you fix your freestanding freezers
Choose a symptom to see related freezer repairs.
Main causes: burned out light bulb, bad door or lid switch, faulty LED light board, wiring failure, control system failu…
Main causes: lack of power, bad compressor, refrigerant leak, bad thermistor, defrost system failure, dirty condenser co…
Main causes: compressor failure, no refrigerant, faulty sensor, control failure, broken defrost heater, bad defrost bi-m…
Main causes: damaged door or lid gasket, cracked cabinet liner, bad defrost bi-metal thermostat, broken defrost heater, …
Main causes: excessive frost, bad defrost heater, bad defrost bi-metal, control system failure, low refrigerant charge, …
Main causes: dirty condenser coils, condenser fan failure, dirty bottom front grill, leaky door or lid gasket…
Main causes: lack of power, control system failure, broken compressor start relay, locked up compressor, compressor moto…
Main causes: leaky door or lid gasket, broken defrost heater, bad defrost bi-metal thermostat, defrost control failure, …
Repair guides for chest freezers
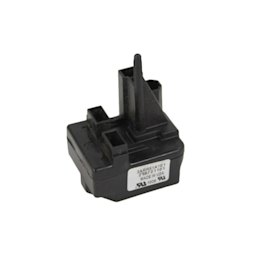
How to replace a freezer compressor start relay
The compressor start relay starts the compressor. If the compressor won’t start, follow these steps to replace a defect…
Repair difficulty
Time required
15 minutes or less
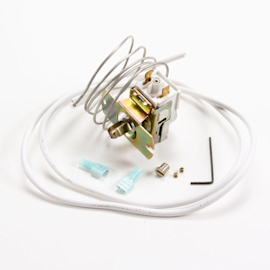
How to replace a freezer temperature control thermostat
The cold control thermostat regulates the freezer temperature. A defective cold control thermostat can prevent the compr…
Repair difficulty
Time required
15 minutes or less
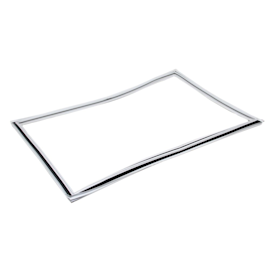
How to replace a freezer lid gasket
The lid gasket prevents air and moisture from entering the freezer when the lid is closed. Follow these steps to replace…
Repair difficulty
Time required
30 minutes or less
Effective articles & videos to help repair your freestanding freezers
Use the advice and tips in these articles and videos to get the most out of your freezer.

Learn about all the convenient features on our Sears PartsDirect website that make your parts purchases easier.…

Get answers to frequently asked questions about Sears and Sears PartsDirect.…
Learn how to repair broken, frayed or damaged wires in your appliances.…