Tools and parts needed
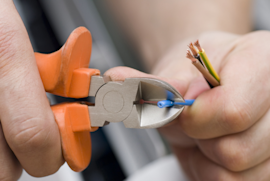
Pliers
Slot screwdriver
Safety sensor kit
Replacement wiring
Remove item blocking safety sensors
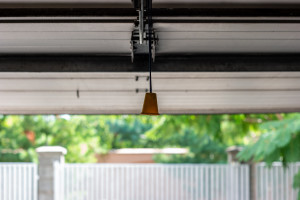
Hi, Wayne here from Sears PartsDirect. Today we're going to talk about troubleshooting a garage door opener that won't close the door and blinks 10 times. The blinking opener lights indicate that the safety sensors are likely blocked or out of alignment. Defective safety sensors or faulty sensor wiring also cause the opener lights to blink 10 times. The safety sensors use an invisible beam of infrared light to detect obstructions in the garage door's path. The sensors won't allow the door to close with their infrared beam blocked. First, look for an item blocking the door and remove it.
Check safety sensor alignment
If there's nothing blocking the safety sensors, check their alignment. You may have bumped a sensor out of position. Each safety sensor has an indicator light. The sending sensor, which has the yellow light, transmits the infrared beam to the receiving sensor, which has a green light. The garage door sensor yellow sending light should always be lit. But you’ll only see the receiving sensor's green light when the sensors are aligned and unobstructed. Make sure that the garage door sensor yellow light is on and then check the green light on the receiving sensor.
Find error code on motor unit
If the green light is off, realign the safety sensors until the green light turns on then try closing the door. If one or both sensor lights won't come on, check the LED troubleshooting light on the motor unit for an error code. The control inside the motor unit flashes the troubleshooting LED a number of times to indicate the cause of a failure.
You may see one of these error codes related to the safety sensors on a common chain-drive garage door opener.
1 blink–Sensor wires are disconnected
2 blinks–Sensor wires are shorted
4 blinks–Sensor eyes are slightly misaligned
A belt-drive garage door opener and some newer chain-drive models flash the up and down arrows to display error codes. Here's a list of error codes related to the sensors on these models.
Up 1 blink, Down 1 blink–Sensors are not installed or wires are broken
Up 1 blink, Down 2 blinks–Wires are shorted or reversed
Up 1 blink, Down 4 blinks–Misaligned or obstructed sensor
Up 4 blinks, Down 6 blinks–Sensors were temporarily obstructed or misaligned
Repair broken or damaged wiring
If you see one of the first two error codes, check the wiring between your motor unit and the sensors for visible damage. You won't be able to check all the wiring if it's routed through the walls to the sensors. Check the wires that you can see and repair any broken or damaged wiring. Here's a video that will give you some additional information about repairing wires.
A loose wiring connection could prevent the garage door opener from closing the door, causing an error code. Check the safety sensor wiring connections on the motor unit. Reconnect any loose wires. Make sure that you have the sensor wires connected to the motor unit correctly. You should see the white wires twisted together and inserted into the white terminal on the motor unit. The white wires with black stripes go into the gray terminal. Connect the wires correctly if you find them reversed.
Check for defective safety sensors
If these tips didn't solve your problem, test your safety sensors directly at the motor unit. This test will help you determine whether you have defective sensors or a break in the wiring that’s not visible. We'll check the sending sensor first. Remove the sending safety sensor with the yellow light from its door rail bracket. Disconnect or cut the sensor wire about 1 foot from the end.
The sensor wire has 2 strands. Separate the strands and strip 1/2-inch of insulation from the end of each strand. Disconnect the existing safety sensor wires from the motor unit. Connect the short, white wire strand to the white motor unit terminal. Connect the other wire strand to the gray terminal. Check the yellow light on the sending safety sensor. If the yellow light doesn't turn on, you’ve confirmed that the safety sensors are defective. Here’s a link to a video that that will show you how to replace them. If the garage door sensor yellow light turns on, then you know that the sending sensor is okay.
Now we'll add the receiving sensor to the test. Remove the receiving sensor from its door rail bracket and disconnect or cut the sensor wire about 1 foot from the sensor end. Separate the sensor wire strands and strip 1/2-inch of insulation. Disconnect the sending sensor wires from the motor unit terminals and twist the white strands with black stripes together. Repeat the process to connect the white sending and receiving sensor wire strands together. Connect the white wire strands to the white motor unit terminal and the white and black strands to the gray motor unit terminal. Hold the sensor eyes directly together and check the lights. If one or both of the lights fail to turn on, replace the safety sensors.
Other possible problems
If both lights turn on, press the remote button. If the door closes, then the safety sensors are okay. Once you've eliminated the sensors, you know the problem must be a break in the wiring. Here’s a link to some replacement wiring that you can use to resolve the problem. Replace the existing safety sensor wires between the garage door opener motor unit and the garage door. Next, connect the new sensor wires to the motor unit terminals and the safety sensors. Reconnect the sensors to the door rail bracket and align them properly so both sensor lights turn on.
I hope this video helped you out. You can find links to the parts we talked about in the video description. Be sure to check out our other videos here on the Sears PartsDirect YouTube channel. Subscribe and I’ll let you know when we post new ones.


