- Kenmore refrigerator water filters
- Whirlpool refrigerator water filters
- Samsung refrigerator water filters
- GE refrigerator water filters
- LG refrigerator water filters
- Frigidaire refrigerator water filters
- KitchenAid refrigerator water filters
- Maytag refrigerator water filters
- Kenmore Elite refrigerator water filters
- Estate refrigerator water filters
- GE Profile refrigerator water filters
- Amana refrigerator water filters
- Bosch refrigerator water filters
- Dacor refrigerator water filters
- Electrolux refrigerator water filters
How to convert a propane grill to natural gas video
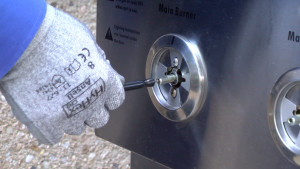

If your house has a natural gas supply line on the patio, you can convert a propane grill to natural gas with a conversion kit and a few simple tools. This video from Sears PartsDirect takes you through the conversion process, including switching the supply hose and orifices, adjusting settings on the burner valves and leak checking the gas connection.
Check out our DIY Gas Grill Repair Help page for more troubleshooting advice, repair guides and grilling articles.
Supplies you might need
Wrench set
Phillips screwdriver
Work gloves
Soapy solution
Brush
Hi, Wayne here from Sears PartsDirect. Today we're going to show you how to convert a gas grill from propane to natural gas. Some homes have a natural gas supply line on the patio that you can use for your gas grill. If your grill uses propane, you’ll need to convert the grill to use natural gas before connecting the gas supply line to your grill.
Kit includes parts for conversion
In this video, we'll switch out the supply hose and orifices to natural gas versions on a Kenmore grill and then adjust the controls. Although your grill may not use this exact procedure, the process should be similar. Check your owner’s manual for the right conversion kit for your gas grill.
In addition to the tools in the conversion kit, you need a wrench set, a Phillips screwdriver and work gloves.
Before you begin, make sure the grill is completely cool if you used it recently. Shut off the gas supply and disconnect the hose from the propane tank. Remove the tank from the grill. If your home's natural gas supply line doesn't already have a disconnect fitting attached, install the disconnect fitting now.
Replace burner orifices with natural gas
Now, let's start by pulling out the main burners. Open the grill lid and remove the warming rack and cooking grates. Next, pull out the flame tamers and remove the cotter pin from the rear of each burner. Pull out each burner by slightly lifting the back of the burner tube while sliding it out of the valve opening. The igniter wire should remain connected to the electrode on each burner, so just lay each burner tube down inside the firebox.
Now we're ready to replace the main burner propane orifices with natural gas orifices. Using the orifice tool from the kit, remove each burner valve orifice and replace it with the natural gas orifice. Tighten each orifice firmly.
Remove the screw and rotate the air shutter to the natural gas setting. Then reinstall the screw. Reinstall each burner tube by pushing it into the valve opening over the orifice and pushing the rear of the burner down over the mounting tab. Reinstall the cotter pin on the back of each burner. Reinstall the flame tamers and cooking grates.
Adjust grill’s burner valve settings
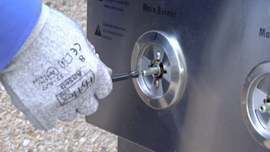
Now we'll adjust the settings on the burner valves for natural gas. Pull the knob off each main burner valve. Using the small slot screwdriver included in the kit, turn the control adjustment screw on the stem of each burner valve counterclockwise 2 complete rotations. Reinstall the valve burner knobs.
Replace other propane orifices
Next, we'll convert the rotisserie burner. Remove the screws on the rotisserie burner cover. The burner shield comes off when you remove the upper screws. Close the grill lid and pull off the rotisserie burner cover. Use a 7 millimeter wrench to remove the propane orifice and install the natural gas orifice in the rotisserie burner orifice holder. Position the rotisserie burner cover over the burner and open the lid. Reinstall the rotisserie burner cover screws, and reinstall the rotisserie burner shield as you insert the upper screws. Reinstall the warming rack.
Now we'll convert the sear burner. Open the sear burner cover and remove the cooking grate. Remove the sear burner mounting screws. Loosen the igniter mounting screw to gain some play in the igniter so you can remove the sear burner. Be careful not to remove the igniter screw completely. If you do, the nut on the end of the screw will fall off into the cabinet and you’ll have to retrieve it. Pull the sear burner back slightly then work it out of the cabinet opening. Remove the propane sear burner orifice using the removal tool. Install the natural gas sear burner orifice. Work the sear burner back into the cabinet opening and secure it using the mounting screws. Tighten the mounting screw on the igniter electrode. Reinstall the cooking grate and close the sear burner cover.
Change supply hoses and perform leak check
Next, we'll replace the propane supply hose with the natural gas supply hose. While holding the manifold supply line steady with a wrench, disconnect the propane supply hose from the manifold. Connect the natural gas supply hose and hand-tighten the connection. Hold the manifold supply line steady with a wrench and firmly tighten the supply hose fitting using a second wrench. Attach the supply hose to your natural gas supply connection.
Next we're ready to leak check the gas supply line connection. Prepare a 50/50 solution of dishwashing liquid and water. Brush some soap solution on the manifold supply hose fitting. Open the natural gas supply valve and check for bubbles on the manifold supply hose fitting. Bubbles indicate a gas leak. If bubbles appear, shut off the valve and tighten the fitting. Reapply the soapy solution, then open the supply valve and check again for bubbles. Repeat the process until the manifold supply hose fitting doesn't leak.
That’s it! Now you're ready to fire up your grill and start cooking using natural gas.
I hope this video helps you out. You can find links to the conversion kit we used in the video description. Check out our other videos on the Sears PartsDirect YouTube channel. Subscribe and we’ll let you know when we post new ones.
Symptoms for gas grills
Choose a symptom to see related gas grill repairs.
Main causes: nearly empty fuel tank, faulty pressure regulator, burner tube clogs, bad burner tube alignment to gas valv…
Main causes: empty fuel tank, tripped flow-limiting device on the pressure regulator, faulty manifold valves, burner tub…
Main cause: worn wheel…
Main causes: damaged or dirty flame tamers, corroded firebox, accumulated grease and debris in the grease pan…
Main causes: clogged burner tubes, cracked insulators on igniter electrodes, wiring failures, bad ignition module, manif…
Repair guides for gas grills
These step-by-step repair guides will help you safely fix what’s broken on your gas grill.

How to replace a gas grill wheel
Replace a broken or damaged wheel in less than 15 minutes.…
Repair difficulty
Time required
15 minutes or less

How to replace a gas grill igniter electrode
Replace the igniter electrode on your gas grill if it won’t light the burner.…
Repair difficulty
Time required
15 minutes or less
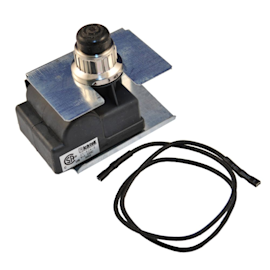
How to replace a gas grill ignition module
Follow these steps to replace the ignition module if it doesn't produce a spark. …
Repair difficulty
Time required
15 minutes or less
Articles and videos for gas grills
Use the advice and tips in these articles and videos to get the most out of your gas grill.

Learn about all the convenient features on our Sears PartsDirect website that make your parts purchases easier.…

Get answers to frequently asked questions about Sears and Sears PartsDirect.…
A conversion kit and a few simple tools are all you need.…
