
$32.49 |
16% OFF Phone Price : $38.49
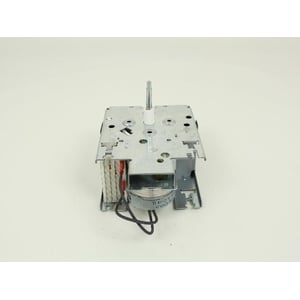
This timer (part number WP22003361) is for washers.
Timer WP22003361 controls the electrical components and the duration of the washer's cycles.
Unplug the washer before installing this part. Wear work gloves to protect your hands.
| Model Name | Model Number | Diagram Name |
|---|---|---|
| Model #LAT9406AAE Maytag washer | LAT9406AAE | Control panel (9406) |
| Model #LAT9406AAM Maytag washer | LAT9406AAM | Control panel (9406) |
| Model #LAT9356ABM Maytag washer | LAT9356ABM | Control panel |
| Model #LAT2300AWW Maytag washer | LAT2300AWW | Control panel |
| Model #LAT9356AAE Maytag washer | LAT9356AAE | Control panel |
| Model #LAW9406ABE Maytag washer | LAW9406ABE | Control panel (lat9406abe) (lat4916abe) (law9406abe) |
| Model #LAT9357AAQ Maytag washer | LAT9357AAQ | Control panel (lat9357aaq) |
| Model #LAT9420AAE Maytag washer | LAT9420AAE | Control panel |
| Model #LAT9357AAE Maytag washer | LAT9357AAE | Control panel |
| Model #LAT9406ABE Maytag washer | LAT9406ABE | Control panel (lat9406abe) (lat4916abe) (law9406abe) |
It was installed so easily and our washer is washing so well now.
My2Cats, NE Ohio
Did you find this review helpful?
Yes, I would recommend this to a friend
Our washer had started skipping cycles and we traced it to a problem with the timer. Installation was fairly easy, but does require access to both the front and back of the machine. 1. Unplug the washer. 2. Remove the control knob cover, slide out the retainer clip and remove the knob, spring and indicator dial. 3. Remove upper back cover - 5 screws. 4. Unplug the cable harness from the lid switch below the timer, noting orientation of the connector. 5. In the front, remove the 2 screws holding in the timer. 6. Pull the old timer out and disconnect the harness and ground jumper. You many need a small screwdriver to get the harness connector loose. 7. Plug in the harness and ground jumper to the new timer and set in place. 8. Reconnect the harness to the lid switch. 9. While holding the timer from the back, screw the unit into the console - 2 screws. You may need a socket wrench to get them started. 10. Replace the indicator dial, spring, knob, retainer clip and knob cover. 11. Replace the upper back cover - 5 screws. 12. Plug the washer in.
Ross F, Maryland
Did you find this review helpful?
Used You Tube to remove front dial. Removed back panel and plugged in new timer where existing one was. Very simple.
JeanneR, Youngsville, LA
Did you find this review helpful?
