CONFIRM THE PART FITS
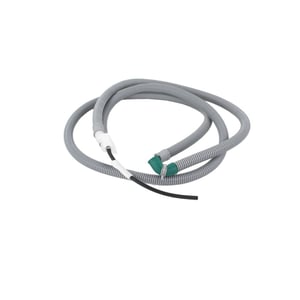
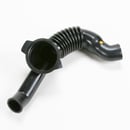
Washer Drain Hose 5215ER2002N
Part #5215ER2002N
Part Information
This drain hose (part number 5215ER2002G) is for washers.
Drain hose 5215ER2002G carries used water from the washer to your house drain.
Shut off the water supply and unplug the washer before installing this part. Wear work gloves to protect your hands.
Frequently Used Together
- $59.84 |9% OFF Phone Price : $65.84
- $44.60 |12% OFF Phone Price : $50.60
- $6.56 |13% OFF Phone Price : $7.56
- $17.62 |10% OFF Phone Price : $19.62
- $21.49 |22% OFF Phone Price : $27.49
- $320.26 |$12.00 OFF Phone Price : $332.26
- $21.89 |22% OFF Phone Price : $27.89
- $20.53 |23% OFF Phone Price : $26.53
- $6.56 |13% OFF Phone Price : $7.56
- $20.97 |22% OFF Phone Price : $26.97
Top models using the same part
| Model Name | Model Number | Diagram Name |
|---|---|---|
| Model #WD-3245RHD LG laundry center | WD-3245RHD | Control panel and dispenser |
| Model #WD-3243RHD LG laundry center | WD-3243RHD | Control panel and dispenser |
| Model #WD-3274RHD LG laundry center | WD-3274RHD | Control panel/dispenser |
| Model #WM2277HB LG washer | WM2277HB | Dispenser |
| Model #WM2277HS LG washer | WM2277HS | Dispenser |
| Model #79648852800 Kenmore washer | 79648852800 | Dispenser parts |
| Model #79648842800 Kenmore washer | 79648842800 | Dispenser parts |
| Model #WM3632HW LG laundry center | WM3632HW | Dispenser assy |
| Model #WM2432HW LG washer | WM2432HW | Dispenser assy |
| Model #WM3770HWA/00 LG washer | WM3770HWA/00 | All parts |
Reviews
Leak no more
After replacing bad drain pump,bad drum bearings,i had a leak i didnt have before after i put everthing back together.tore washer apart again and found the drain hose had rubbed a small hole where it contacted a plastic piece near the bottom of washer.I ordered the new drain hose and found it didnt rest at the bottom of the washer like the original,but sat up higher along side the washer frame against a piece of foam,humm, maybe thats what the original one was supposed to rest against. Well all is good now and my washer runs better than new.
JOHN, Nj
Did you find this review helpful?
- Ease of Installation
- Moderate
- Duration of Installation
- 1 - 2 hours
Yes, I would recommend this to a friend
Needs install directions
Would really help if it came with some directions. I found out the washer top removes from a PC board install instruction. Its really hard to get to the green right angle pipe to install or remove it. Only way I could see was reaching through the bottom of the washer. Which requires tipping the washer and two people (one to hold it tipped).
McCal, Oregon
Did you find this review helpful?
- Ease of Installation
- Difficult
- Duration of Installation
- 30 minutes - 1 hour
Great
Simple and easy to find online and helpful with the pics to reference
Kristy, Arizona
Did you find this review helpful?
- Ease of Installation
- Easy
- Duration of Installation
- 30 minutes - 1 hour
Yes, I would recommend this to a friend
Drain hose
Working great part came on time very pleased with it
Bones, Florida
Did you find this review helpful?
- Ease of Installation
- Easy
- Duration of Installation
- 30 minutes - 1 hour
Yes, I would recommend this to a friend
Installation Instructions
Hose assembly received quickly as scheduled. No instructions included, so I am telling how I did it (Maybe over detailed). Tools required: #2 Phillips screwdriver, #20 torx screwdriver, slip joint pliers. 1. Unplug washer, turn off water, disconnect hoses and drain filter. 2. Remove back cover (4 Phillips screws). 3. Place machine on side (hose side down for access). 4. Loosen drain hose at bottom by removing clamp with pliers and pulling off at the connector. There is open access on the bottom of the machine. 5. Release hose from retainers along back of machine. 6. Tip machine upright and remove top cover. Remove bottom screws from cover retainer, slide cover to rear and lift off. 7. Unhook Vacuum hose at top; remove torx screw from back of hose manifold and lift entire assembly up and out through the top of the machine. 8. Put the new hose assembly in place through the top with the hoses following the original path. 9. Put vacuum hose on; put manifold in place and install the torx screw. 10. Replace top by sliding it into place and replace the screws previously removed. 11. Lay machine on side again for access to hook up hose on bottom and place the hose back into retainers. 12. Stand machine upright; replace the back cover. 13. Attach water hoses, turn on water, put drain hose in place, plug in washer. Ready to go (assuming washer is back in correct location).
Ron C, Salem, NH
2 people thought this review was helpful.
- Ease of Installation
- Easy
- Duration of Installation
- 1 - 2 hours
Yes, I would recommend this to a friend
Great!
Perfect transaction and the part was received the next day!
Anon, CA
Did you find this review helpful?
- Ease of Installation
- Moderate
- Duration of Installation
- More than 2 hours
F'cil pero largo proceso
Usamos el video de tutor'a para instalarlo, largo el proceso pero sencillo adem's se necesita ayuda.
Julio, Puerto Rico
Did you find this review helpful?
- Ease of Installation
- Easy
- Duration of Installation
- 30 minutes - 1 hour
Yes, I would recommend this to a friend
Concluded my problem at last.
Because I am not familiarized installing washing machine parts, the work was very well done.
srangel1012, Dorado, puerto rico
Did you find this review helpful?
- Ease of Installation
- Moderate
- Duration of Installation
- 1 - 2 hours
Yes, I would recommend this to a friend
