- Kenmore refrigerator water filters
- Whirlpool refrigerator water filters
- Samsung refrigerator water filters
- GE refrigerator water filters
- LG refrigerator water filters
- Frigidaire refrigerator water filters
- KitchenAid refrigerator water filters
- Maytag refrigerator water filters
- Kenmore Elite refrigerator water filters
- Estate refrigerator water filters
- GE Profile refrigerator water filters
- Amana refrigerator water filters
- Bosch refrigerator water filters
- Dacor refrigerator water filters
- Electrolux refrigerator water filters
How to replace a gas range oven door outer glass panel
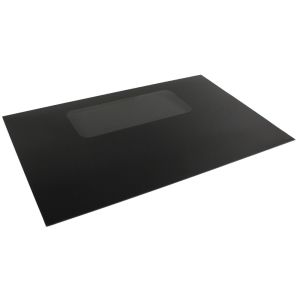
This repair guide gives step-by-step instructions on how to remove the door from a gas range to replace a broken or damaged door outer glass panel. Before starting this repair, review the steps below to fully know how to replace the outer glass panel using a manufacturer-approved gas range part.
This procedure works for many Kenmore 790-series, Frigidaire and Electrolux gas ranges. You also can use the same basic process to replace the outer glass panel on some Samsung models.
Quick links
Video
Instructions
Tools required
Double-stick oven door tape (if not included with the oven door glass)
Phillips screwdriver
Slot screwdriver
Scraper
Work gloves
Repair difficulty
Time required
45 minutes or less
Repair difficulty
Time required
45 minutes or less
Replacing the oven outer door glass panel in a gas range repair guide video.
Replacing the oven door glass in a gas range video.
Instructions
- 01.
Remove the door
Fully open the oven door. Use a slot screwdriver to pry down the locking tabs to the unlocked position on both sides of the door.
Raise the door to the broil stop position, which is about 1/4 open. Grip both sides of the oven door and then lift up and out to remove the door.
Tip: Check your owner's manual for details about removing the door from your model.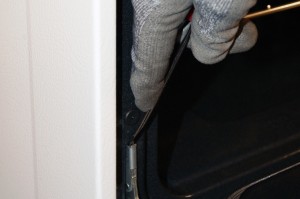
PHOTO: Release the locking tabs.
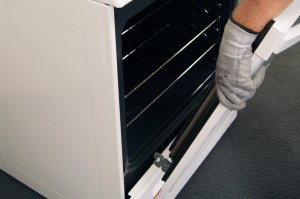
PHOTO: Remove the oven door.
- 02.
Remove the handle
Carefully place the oven door face down on a padded surface, such as a towel-covered table. Using the type of screwdriver that fits the screws, remove the screws that secure the door handle to the top of the oven door. Remove the handle.
Tip: The screws that hold the handle in place also help secure the trim. The trim might shift when you remove the handle. You'll remove it completely in a later step.
PHOTO: Place the door on a padded surface.
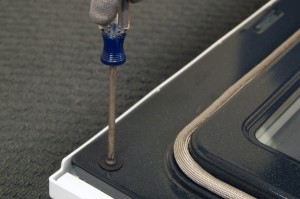
PHOTO: Remove the door handle screws.
- 03.
Remove the inner door panel
Remove the screws at the bottom of the oven door. Lift the inner door panel assembly off the outer door panel and set it on the padded surface.
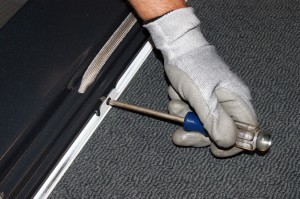
PHOTO: Remove the bottom screws.
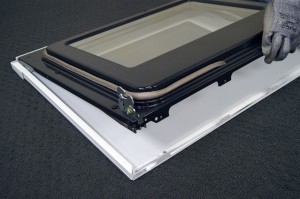
PHOTO: Remove the inner door panel.
- 04.
Remove the top trim
Slide the top trim out of the channels that help secure it to the outer oven door.
Remove the top trim.
- 05.
Separate the door panel frame from the glass window
The outer door panel frame is attached to the outer glass window with double-stick foam tape. Using a slot screwdriver, carefully pry up on the metal frame where there are strips of double-stick foam tape.
Remove the outer door glass panel from the door frame. Set the oven's glass panel aside for disposal.
Use a scraper to carefully remove the residue of the foam tape from the front of the outer door frame. You can try using adhesive remover to help remove the residue.
Tip: Take care to not damage or bend the door frame so you can reuse it. If the frame is bent or damaged in this step, you will have to replace it.Warning: If the outer front door glass panel is broken, use caution when handling, storing and disposing of the glass to avoid lacerations. - 06.
Attach the new outer door glass panel
Set the new glass panel face down on the padded surface. Apply double-stick foam tape to approximately the same areas on the frame where the tape was located before.
Carefully position the frame on top of the new glass panel—this procedure may require 2 people, to ensure that you have the frame lined up properly. Press the frame onto the outer door glass so that the double-stick tape bonds the surfaces.
- 07.
Reattach the top door trim
Slide the top door trim into the channels at the top of the door frame. Ensure that the top trim is seated and lined up properly.
- 08.
Reassemble the door panels
Position the inner door panel assembly above the outer door panel and frame. Carefully lower the inner door panel assembly into place. Insert the screws at the bottom of the door to secure the inner door panel assembly to the outer door panel frame and loosely tighten the screws.
- 09.
Reattach the handle
Position the door handle at the top of the door. Insert the screws and loosely tighten the screws to hold the door handle in place. If you meet resistance as you start turning the screw, back out the screw to ensure it's seated and lined up properly and then begin tightening it again.
- 10.
Tighten all screws
Tighten the screws in the door handle until you meet resistance and then give the screwdriver a final firm twist to snug the screw tight. Do the same to tighten the screws on the bottom of the door assembly. Don't overtighten.
- 11.
Reattach the door
Position the door in the broil position and work the oven door hinges back into the receivers on the front of the range or oven frame. Open the door fully and rotate the hinge locking pins into the locked position. Close the oven door.
Tip: Refer to the owner's manual for directions for reattaching the oven door.
Warning: Undertaking repairs to appliances can be hazardous. Use the proper tools and safety equipment noted in the guide and follow all instructions. Do not proceed until you are confident that you understand all of the steps and are capable of completing the repair. Some repairs should only be performed by a qualified technician.
Most common symptoms to help you fix your ranges
Choose a symptom to see related range repairs.
Main causes: broken oven door lock assembly, wiring failure, electronic control board problem…
Main causes: bad bake element, broken burner igniter, control system failure, blown thermal fuse, faulty temperature sen…
Main causes: food splatters, spilling food on the oven door, allowing liquid to drip through oven door vent when cleanin…
Main causes: faulty temperature sensor, electronic control board problem, control thermostat failure, weak burner ignite…
Main causes: broken broiler element, weak or broken broil burner igniter, control system failure, faulty temperature sen…
Main causes: power supply problem, control thermostat or electronic control board failure, broken element, bad burner ig…
Main causes: power supply failure, blown thermal fuse, bad relay control board, damaged terminal block, wiring failure…
Most common repair guides to help fix your ranges
These step-by-step repair guides will help you safely fix what’s broken on your range.

How to replace a range oven door switch
The oven door switch detects whether the oven door is closed and helps control the oven light. Replace the switch if it …
Repair difficulty
Time required
30 minutes or less
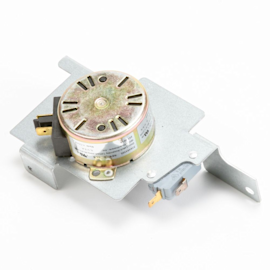
How to replace a range oven door lock assembly
Oven door not locking? You can replace the lock assembly in less than 30 minutes. Here's how.…
Repair difficulty
Time required
15 minutes or less
Effective articles & videos to help repair your ranges
Use the advice and tips in these articles and videos to get the most out of your range.

Learn how to clean and maintain your stove to keep it in top shape.…

Learn about all the convenient features on our Sears PartsDirect website that make your parts purchases easier.…

Get answers to frequently asked questions about Sears and Sears PartsDirect.…