- Kenmore refrigerator water filters
- Whirlpool refrigerator water filters
- Samsung refrigerator water filters
- GE refrigerator water filters
- LG refrigerator water filters
- Frigidaire refrigerator water filters
- KitchenAid refrigerator water filters
- Maytag refrigerator water filters
- Kenmore Elite refrigerator water filters
- Estate refrigerator water filters
- GE Profile refrigerator water filters
- Amana refrigerator water filters
- Bosch refrigerator water filters
- Dacor refrigerator water filters
- Electrolux refrigerator water filters
Whirlpool Duet dryer error codes

These error code explanations can help you diagnose a problem with your Whirlpool Duet HE dryer. For repair how-to help, visit the PartsDirect repair help section, which includes repair help for dryers, other major appliances, lawn and garden equipment, garage door openers, vacuum cleaners and more. Search for your model number to find a complete list of replacement parts for your dryer.
Error Code
Condition
DIY advice
PF
Power failure
Check/Repair
A power failure occurred while the dryer was running. Press Start to continue the cycle or Stop to clear the display. If frequent power failures occur, check the outlet cord for the dryer.
Possible parts
Outlet cord
F:01
Main electronic control board failure
Check/Repair
Unplug the dryer for 5 minutes and then plug it in. If the code returns, replace the main electronic control board.
Possible parts
Main electronic control board
F:02
Keypad/User Interface failure
Check/Repair
A button is stuck on the keypad on one of the two user interface control assemblies in the console. If you can't free the button, replace the user interface control assembly with the stuck button.
Possible parts
User interface control assembly
F:22
Outlet thermistor failure
Check/Repair
The control detects an electrically open outlet thermistor (temperature sensor). Unplug the dryer and check the resistance of that thermistor, which should be about 10,000 ohms. If the outlet thermistor is defective, replace it.
Possible parts
Outlet thermistor
F:23
Outlet thermistor failure
Check/Repair
The control detects an electrically shorted outlet thermistor (temperature sensor). Unplug the dryer and check the resistance of that thermistor, which should be about 10,000 ohms. If the outlet thermistor is defective, replace it.
Possible parts
Outlet thermistor
F:24
Inlet thermistor failure
Check/Repair
The control detects an electrically open inlet thermistor (temperature sensor). Unplug the dryer and check the resistance of that thermistor, which should be about 50,000 ohms. If the inlet thermistor is defective, replace it. NOTE: The inlet thermistor is combined with the high-limit thermostat on this dryer.
Possible parts
High-limit thermostat/inlet thermistor
F:25
Inlet thermistor failure
Check/Repair
The control detects an electrically shorted inlet thermistor (temperature sensor). Unplug the dryer and check the resistance of that thermistor, which should be about 50,000 ohms. If the inlet thermistor is defective, replace it. NOTE: The inlet thermistor is combined with the high-limit thermostat on this dryer.
Possible parts
High-limit thermostat/inlet thermistor
F:28
Moisture sensor failure
Check/Repair
Unplug the dryer and check the wiring connections on the moisture sensor. If the wiring connections are sound, replace the moisture sensor.
Possible parts
Moisture sensor
F:29
Moisture sensor failure
Check/Repair
Unplug the dryer and check the wiring connections on the moisture sensor. If the wiring connections are sound, replace the moisture sensor.
Possible parts
Moisture sensor
F:30
Restricted airflow
Check/Repair
Clean lint from the lint screen. If you use fabric softener sheets, wash the lint screen with water and a soft- bristled brush to remove fabric softener buildup. Clear any clog or restriction from the exhaust air duct system to the outside of your home.
Possible parts
F:70 or F:71
No communication between the electronic control board and the user interface control board assemblies
Check/Repair
Unplug the dryer. Check the wire harness connections between the main electronic control board and the user interface control board assemblies. If the connections are sound, have a technician diagnose the cause of the communication failure. The main electronic control board and/or the user interface control assemblies might need to be replaced.
Possible parts
Main electronic control board, User interface control assemblies
F:72 through F:78
User interface control assembly failure
Check/Repair
Unplug the dryer. Check the wire harness connections between the user interface assemblies. Also check the wire harness connections between the main electronic control board and the user interface assemblies. If the wiring connections are sound, then one or both of the user interface control assemblies probably needs to be replaced.
Possible parts
User interface control assemblies
Most common symptoms to help you fix your dryers
Choose a symptom to see related dryer repairs.
Main causes: bad drum support roller, damaged idler pulley, broken blower fan blade, worn drum glide bearing, bad drive …
Main causes: bad gas valve coils, broken heating element, tripped safety thermostat or fuse, bad operating thermostat, c…
Main causes: damaged door strike, worn door catch…
Main causes: bad timer or electronic control board, door switch failure…
Main causes: lack of electrical power, bad power cord, wiring failure, bad control board, blown thermal fuse, bad door s…
Main causes: clogged exhaust vent, bad motor relay, loose dryer door catch, bad door switch, control system failure, fau…
Main causes: clogged exhaust system, heating system failure, deposits on moisture sensor, control system failure…
Main causes: door switch failure, lack of power, broken belt, blown thermal fuse, bad drive motor, control system failur…
Most common repair guides to help fix your dryers
These step-by-step repair guides will help you safely fix what’s broken on your dryer.

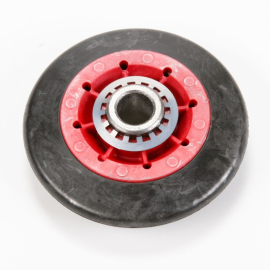
How to replace a dryer drum support roller
If your dryer thumps or squeals, replace the drum support roller to restore quiet to your home.…
Repair difficulty
Time required
90 minutes or less

How to replace a dryer thermistor
The thermistor senses the air temperature in the dryer. If your dryer overheats or doesn't heat at all, the thermistor …
Repair difficulty
Time required
30 minutes or less

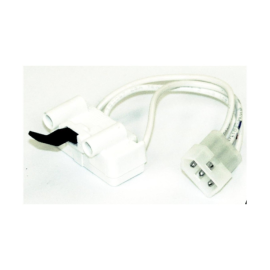
How to replace a dryer door switch
The dryer won't start if the door switch isn't working correctly. You can install a replacement dryer door switch in les…
Repair difficulty
Time required
15 minutes or less
Effective articles & videos to help repair your dryers
Use the advice and tips in these articles and videos to get the most out of your dryer.

Get expert tips on using your dryer efficiently to save energy.…

Learn about all the convenient features on our Sears PartsDirect website that make your parts purchases easier.…

Get answers to frequently asked questions about Sears and Sears PartsDirect.…