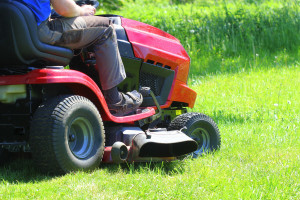
Hi, this is Wayne with Sears PartsDirect. Today we're going to troubleshooting a riding lawn mower that doesn't do anything when you turn the key to start the engine—not even click.
Before you do anything, make sure the parking brake is set and the blades are disengaged. The riding mower won’t start otherwise. You'd be surprised how many people forget those steps and think something is wrong with their riding mower.
Supplies you might need
What went wrong
What is the significance of the click when you turn the key? When you hear the click, you know the starter solenoid coil is getting power from the battery through the ignition switch.
If you don't hear that click, either the starter solenoid has failed or the starter solenoid coil isn’t getting power.
We'll show you how to pinpoint the cause by checking the riding mower’s battery, solenoid posts and coil, fuse, ignition switch, brake interlock switch and blade switch.
We'll use this Craftsman riding lawn mower for our troubleshooting. This type of riding mower is common, but the wiring and components in yours might be different. Refer to the wiring diagram for your model if you notice differences.
How the riding mower starting system works
To understand how we track down the problem, it helps to know how the starting system works:
The positive, red battery cable connects to one of the two large terminal posts on the starter solenoid.
The black wire connected to the other large terminal on the starter solenoid carries power to the starter motor to start the engine.
A small red wire branches off the red solenoid terminal post to carry power through the ignition switch to the coil at the bottom of the starter solenoid.
When you turn the key to the start position, the ignition switch sends power through the white wire and energizes the coil inside the solenoid. The coil closes an internal contact to send power from the red battery cable to the black wire, which powers the starter motor to spin the engine.
Is the battery dead?
So what can go wrong with the starting system?
Well, a dead battery won't power up the starter system and could prevent the solenoid coil from clicking.
To check the battery, we’ll use a multimeter to measure the DC voltage across the battery terminals.
Put on work gloves and safety goggles.
Turn off the ignition.
Access the battery. In this type of riding lawn mower, you lift the seat to get to the battery.
With the multimeter set to measure DC voltage, touch the red multimeter probe to the positive or red battery terminal and the black meter probe to the negative or black battery terminal.
If the battery is good, it measures more than 12 volts DC.
If it measures less than 12 volts, the battery is weak or dead and you've likely found the problem. A weak or dead battery won't power the starter solenoid coil.
Try recharging the battery using a charger. Or, in a pinch, you can use jumper cables to jump-start a riding lawn mower model that uses a 12-volt battery.
If the battery won’t recharge, replace it.
Check for power to the solenoid
If the battery is okay, it means power is getting to the red battery cable. But, is voltage getting through the red battery cable to the red terminal post? To check that, let’s measure voltage at the red terminal post.
With the multimeter set to measure DC voltage, touch the red meter probe to the red post on the starter solenoid and the black meter probe to the negative terminal on the battery. It should measure more than 12 volts.
A word of warning here: Don’t let the meter lead touch both the solenoid posts at the same time or you’ll see a severe spark. Shorting across the solenoid posts sends the current to the starter motor. Some of you may be tempted to short across the solenoid posts intentionally using an insulated screwdriver to start the engine. But we strongly discourage this approach, because this dangerous practice overrides safety switches.
If the meter measures less than 12 volts, check the battery terminals and cable leads for corrosion. Clean corrosion off the battery terminals and battery cable leads with a wire brush—corrosion can prevent the red solenoid post from getting power. Recheck the voltage. If it still doesn’t measure more than 12 volts at the red post, replace the red battery cable.
Check for power to the solenoid coil
So, let's get back to troubleshooting the starting system.
Now that we know the red terminal is getting power, the next step is to find out whether the solenoid coil gets power when you turn the key.
If you measure voltage at the coil but the internal contact doesn't click, the starter solenoid is to blame. The solenoid clicks when it sends power to the starter motor.
To check voltage on the solenoid coil wires, you need clip-on meter probes to hold the probes on the wires as you turn the ignition key, unless you have a helper to turn the key while you hold the probes on the wires.
Pull the white and black wires off the spades of the solenoid.
Set the multimeter to measure DC voltage.
Clip the red meter probe to the white wire female spade connector and the black meter probe to the black wire female spade connector.
Turn the ignition key to the start position, note the voltage reading on the meter display and then turn the ignition key off.
If the multimeter measures battery voltage, it will be more than 12 volts. Replace the starter solenoid because the coil is getting power but not closing the internal contact to send power to the starter motor. Here's a video that shows you how to replace the starter solenoid.
If it measures 0 volts, there’s a break in the circuit to the solenoid coil. The starter solenoid is likely okay, it's just not getting power. Time to test the coil circuit.
Test the coil circuit
We'll check the ground side of the circuit first. The black wire attaches to the solenoid coil and connects to the metal frame of the riding mower as a ground. A break in that wire keeps the coil from getting power.
To check the ground wire, we check for resistance between the female spade on the black wire and the metal frame of the mower.
Disconnect the negative battery cable and then the positive battery cable to completely kill power to the mower before checking resistance.
Tuck the cables away from the battery to keep them from touching the posts and accidentally restoring power.
Set the multimeter to measure resistance and touch one meter probe to the black wire female spade and the other meter probe to bare metal on the mower frame to ground it—I’m using the mower deck height lever.
A reading near 0 ohms of resistance means the black wire is grounded.
A reading of infinite resistance means you must to find and repair the break in the black ground wiring. Once you restore a good path to ground on the black wire, you should be able to start the engine.
Check the fuse
If the ground side of the circuit is okay, we'll check the hot side of the circuit that begins with the small red wire on the starter solenoid terminal and ends at the white wire that connects to the coil spade.
The circuit includes a fuse, the ignition switch, brake switch and blade switch.
First, we’ll check for a blown fuse because you can usually see a blown fuse just by looking at it.
The fuse in this mower is right here next to the starter solenoid, but we need to pull out the battery and battery box to access the fuse.
Move the zip tie over and pull the fuse from the holder.
If you find the fuse element broken like this, replace the fuse because it's definitely blown.
If you're unsure whether the fuse is blown, check for continuity through the fuse using your multimeter. Place one meter probe on each of the fuse leads to measure resistance through the fuse. You should measure near 0 ohms of resistance through the fuse. If you measure infinite resistance, replace the fuse because it's blown.
Keep in mind that the fuse blew because of a short in a component or wiring. Follow the steps in this video to determine the cause of a blown fuse and fix the problem so the fuse doesn't blow again soon after you replace it.
If the fuse is okay, reinstall it in the holder and secure it with the zip tie.
Test the ignition switch
Next, we'll check continuity through the red wire from the starter solenoid post to the ignition switch.
Open the mower hood.
Pull the wire harness off the ignition switch.
Release the locking tabs on the ignition switch and push it out of the dash.
Push the wire harness plug through the hole so you can easily access the contacts for testing.
With the multimeter set to measure resistance, place one meter probe on the starter solenoid post with the red wire and the other meter probe on the female plug spade with the red wire attached.
You should measure near 0 ohms of resistance through this section of wiring. If you measure infinite resistance, find and repair the break in the red wire.
If this section of wiring is okay, we'll test the ignition switch next.
When you turn the key to start the engine, internal ignition switch contacts should complete a circuit from the red wire on the B terminal to the white wire on the S terminal.
To test the ignition switch, we'll measure the resistance between terminals B and S with the key turned to the start position. With the multimeter set to measure resistance, touch one meter probe to the B prong on the back of the ignition switch and the other meter probe to the S prong. Turn the key to start the engine and check the resistance in your meter display.
You should measure near 0 ohms of resistance. If you measure infinite resistance, then replace the ignition switch because it isn't closing the contact B to S to send voltage to the solenoid coil.
Test the brake interlock switch
If the ignition switch is okay, then we've isolated the circuit break to the section of white wire that includes the brake switch and blade switch.
We’ll check the brake switch first. To give you a better view, we’ve removed the hood.
To access the brake switch, remove the air duct mounting screws and pull off the air duct.
Carefully move the fuel tank out of the way. Drain some fuel from the tank if it’s too heavy to lift.
Next, remove the lower right dash fastener and pull off the lower dash. Now you can get to the brake switch for testing.
Note the prongs that the white wires connect to because those are the prongs that we’ll check resistance through to determine whether the brake switch is okay.
Pull the wire harness off the brake switch.
With your multimeter set to check resistance, touch one meter probe to one prong and the other meter probe to the other prong that connects to the white wires.
You should measure near 0 ohms of resistance if the brake switch is okay.
If you measure infinite resistance, replace the brake switch because it’s broken. Here’s a video that shows how.
Check the blade switch
If the brake switch is okay, we’ll check the blade switch.
Remove the clutch lever assembly mounting screws and pull the assembly down slightly to access the blade switch.
Note the prongs that the white wires connect to and then disconnect the wire harness from the blade switch.
With your multimeter set to check resistance, touch the meter probes to the prongs that the white wire connected to.
The multimeter should show near 0 ohms of resistance if the blade switch is okay. If it measures infinite resistance, replace the blade switch because it’s broken.
If the blade switch is okay, then there’s a break in the white wire between the ignition switch and the solenoid coil that’s preventing the coil from getting power. Find and repair the wiring break.
Now that you’ve gotten through all of our troubleshooting tips, you should be able to start your mower. Now you can get to the real work of mowing your lawn!
I hope this video helps you out today. Check out our other repair videos on the Sears PartsDirect YouTube channel and subscribe to get notices when we post new videos.


