Frigidaire Range Oven Temperature Sensor (repla...
Part #316490000


If the Element On light on your stovetop stays lit even when the burners are turned off, it means that a control switch for one of the surface elements is broken. This Sears PartsDirect video shows you how to access and check the switches so you can find and replace the broken part and get the light working correctly again.
For more DIY help with your electric or gas range, check out our repair help page for troubleshooting tips and videos, repair guides and error code charts.
Nut driver
Electrical tape
Hi. Wayne here from Sears PartsDirect. Today we’re going to talk about what to do when the Element On light stays lit constantly on your stovetop. When that light stays on all the time, you can’t tell at a glance whether all the surface burners are off.
A failed contact in one of the surface element switches causes this problem. This video will help you figure out which switch is broken.
The Element On light gets power through the wire that connects to a spade on each of the surface element switches. The wire color and spade label on the element switch can vary by model, but often the wire is purple and the spade is labeled “P.”
When you turn on a burner, the surface element switch sends power through the purple wire attached to the “P” spade. Current travels through the purple wire to the Element On light so it lights up.
When you turn off a burner, the surface element switch opens an internal contact and stops sending power to the Element On light so the light turns off. At least that’s what’s supposed to happen.
When the Element On light stays lit even though you have all the burners turned off, one of the switches has a stuck contact that is sending power to the Element On light constantly.
Let’s find that broken switch.
To do this troubleshooting, you need a nut driver to remove the top back panel. You also need electrical tape to insulate the ends of wires that you disconnect from the surface element switches during testing.
First, pull out the range so you can get to the back of the switches.
Unplug the range and remove the top back panel to reveal the switches and wires.
This purple wire starts at the double-element switch on this range and then connects to each of the other switches before it ends up at the Element On light.
To find out which switch failed, you’ll disconnect the purple wire from each of the surface element switches one at a time.
With the range still unplugged, pull the purple wire off the double element switch and tape the end with electrical tape so the wire doesn’t short to metal inside the range. This is very important. If the wire shorts to metal, you can be electrocuted by touching any metal on the range when you plug it back in.
Plug the range in and see if the Element On light stays lit.
If the light doesn’t come on, the double-element switch is your problem. You’ll need to replace it. Watch our video Replacing a range surface element control switch to learn how.
If the Element On light stays lit when you plug in the range, we’ll move on to testing the next switch.
Remember to unplug the range again before pulling the wires from the next element switch. You don’t want to touch live wires and get shocked. Trust me, it hurts and can cause serious injury.
Next, unplug the lower wire harness connector from the second switch. This range uses plastic clips to help connect the wires to the single surface element switches, so plug the right side of the clip back in while keeping the purple wire unplugged.
The plastic plug keeps the purple wire from shorting to metal so you don’t have to use electrical tape to insulate the end of the wire during this part of the test.
If your range doesn’t have this type of plastic plug, tape the end of the wire with electrical tape to prevent it from shorting against metal.
Plug the range back in and see if the Element On indicator lights up.
If the Element On light is off, you’ve found the bad switch. That’s the one you’ll need to replace.
If the Element On light stays on, the second switch is okay and you’ll have to test the third switch.
Leaving the first two switches disconnected, unplug the range again and disconnect the purple wire from the third surface element switch.
Plug the right side of the clip back in while keeping the purple wire unplugged. Replace the third element switch if the Element On light is off when you restore power to the range.
If the Element On light stays lit when you restore power, you know by process of elimination that the fourth surface element switch is the problem. Once you put in a new switch, reinstall the back panel, plug in the range and move it back in place.
If you find and replace a broken switch and the Element On light still stays lit, that means you have another broken switch. Repeat the testing to find the second broken switch.
I hope this video helps you out today. Check out our other videos on the Sears PartsDirect YouTube Channel. Subscribe and we’ll let you know when we post new ones.
Main causes: faulty surface element, burner control switch failure, temperature limiter not working properly, loose wiri…
Main causes: impact from dropping an item on the glass surface, ceramic glass surface flaw, surface element temperature …

These step-by-step instructions guide you through replacing the oven hidden bake element in an electric range.…

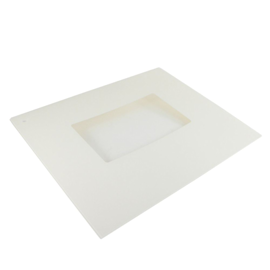
Learn how to replace a damaged outer window panel on your oven door with these step-by-step instructions. …

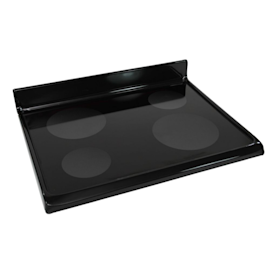
These step-by-step instructions explain how to replace a damaged ceramic glass cooktop on an electric range. …

Learn about the differences between cooking on gas and electric stoves.…

Learn about all the convenient features on our Sears PartsDirect website that make your parts purchases easier.…

Get answers to frequently asked questions about Sears and Sears PartsDirect.…