- Kenmore refrigerator water filters
- Whirlpool refrigerator water filters
- Samsung refrigerator water filters
- GE refrigerator water filters
- LG refrigerator water filters
- Frigidaire refrigerator water filters
- KitchenAid refrigerator water filters
- Maytag refrigerator water filters
- Kenmore Elite refrigerator water filters
- Estate refrigerator water filters
- GE Profile refrigerator water filters
- Amana refrigerator water filters
- Bosch refrigerator water filters
- Dacor refrigerator water filters
- Electrolux refrigerator water filters
10 must-have tools for appliance repair
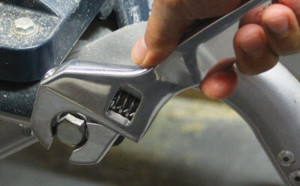

If you’re considering repairing your broken appliance on your own, be sure you have the proper tools for the job.
While some repairs demand specific tools, many just require basic tools you might already own. We’ve put together a list of the top 10 tools every do-it-yourselfer should have.
Screwdriver set. Make sure you at least have a slot and a Phillips screwdriver. Many appliances use Torx screws. Consider buying a cordless drill/driver and a screwdriver bit set with various sizes of Torx, slot and Phiilips driver bits so you can remove any type of screw.
Nut driver set. It's a good idea to have both metric and English sizes because some appliances use metric fasteners.
Wrench set. You'll need combination wrench sets in English and metric sizes. A socket wrench set also comes in handy for many repairs.
Adjustable open-end wrench. Just as its name suggests, the jaw on the wrench is adjustable to accommodate various sizes of nuts and bolts.
Multimeter. A multimeter measures electrical properties and is essential for diagnosing electrical problems. Our How to Use a Multimeter to Test Electrical Parts Video help you understand safe testing procedures when using a multimeter.
Pliers. Needle-nose pliers are perfect for gripping small pieces; they also can bend or cut wires. Use channel-lock pliers to loosen water hose fittings on washers and dishwashers. Standard pliers can help you easily release hose clamps.
Putty knife. Not just for spreading putty, this tool is very useful for scraping or prying..
Work gloves. Even the simplest repairs can expose you to sharp edges or hot surfaces, so wear work gloves to protect your hands.
Safety goggles or glasses. Safety eyewear is a necessity for protecting your eyes from particles or chemicals during repairs.
Thread-sealing tape. Use this thin, white tape on some threaded pipe fittings in appliances to prevent leaks.
Most common symptoms to help you fix your trash compactors
Choose a symptom to see related trash compactor repairs.
Main causes: broken drive gear and sprocket chain, stripped power nuts, faulty top limit and directional switch…
Main causes: stuck foot pedal, bad momentary start switch, power switch failure…
Main cause: broken top limit and directional switch…
Main cause: faulty drawer tilt switch …
Main causes: stripped or broken power nuts, broken or disconnected drive gear and sprocket chain, damaged drive parts…
Main causes: bent drawer support rollers, damaged trash container…
Main causes: lack of power, faulty drawer safety switch, bad power switch, momentary start switch failure, bad drive mot…
Most common repair guides to help fix your trash compactors
These step-by-step repair guides will help you safely fix what’s broken on your trash compactor.
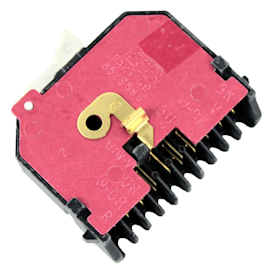
How to replace a trash compactor motor centrifugal switch
If the trash compactor ram won’t return to the top position, replace the motor centrifugal switch by following the instr…
Repair difficulty
Time required
45 minutes or less
How to replace a trash compactor momentary start switch
The momentary start switch starts the motor when you lift the foot pedal. This repair guide shows how to replace the swi…
Repair difficulty
Time required
15 minutes or less
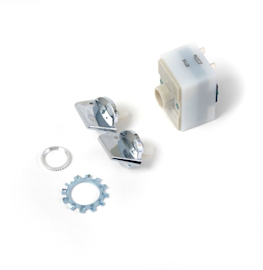
How to replace a trash compactor power switch
If the trash compactor won’t power up, use the steps in this repair guide to replace the power switch.…
Repair difficulty
Time required
30 minutes or less
Effective articles & videos to help repair your trash compactors
Use the advice and tips in these articles and videos to get the most out of your trash compactor.

Learn about all the convenient features on our Sears PartsDirect website that make your parts purchases easier.…

Get answers to frequently asked questions about Sears and Sears PartsDirect.…

Learn some of the most common symbols found in a wiring diagram and what they mean.…