- Kenmore refrigerator water filters
- Whirlpool refrigerator water filters
- Samsung refrigerator water filters
- GE refrigerator water filters
- LG refrigerator water filters
- Frigidaire refrigerator water filters
- KitchenAid refrigerator water filters
- Maytag refrigerator water filters
- Kenmore Elite refrigerator water filters
- Estate refrigerator water filters
- GE Profile refrigerator water filters
- Amana refrigerator water filters
- Bosch refrigerator water filters
- Dacor refrigerator water filters
- Electrolux refrigerator water filters
How to make basic cuts with a table saw
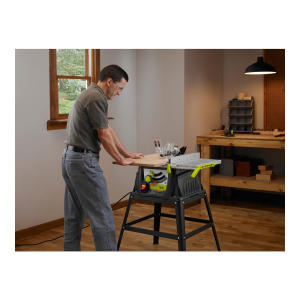

The most common cut on a table saw is a rip cut, and no other tool out there compares with a table saw in making this cut. A rip cut is lengthwise and with the grain of the wood. Always use a work support or outfeed table to keep the work piece from falling off the back of the table.
Lock the rip fence at the desired setting.
Turn on the saw.
Place the work piece against the fence, a few inches in front of the blade. The edge you hold against the fence must be straight.
Hold the work piece firmly down and against the fence while steadily feeding it into the blade.
Continue feeding until the entire work piece has cleared the blade.
A crosscut, as its name suggests, is a cut made across the width and grain of the work piece. Use a miter gauge with an auxiliary fence when making this cut. If making repetitive cuts, clamp a block of wood to the auxiliary fence as a stop. Clamp the block toward the front of the fence so the material isn't touching the block when it enters the blade.
If cutting the right end of the work piece, slide the miter gauge into the left slot; if cutting the left end, slide the miter gauge into the right slot.
Hold the work piece against the auxiliary fence so the cut mark aligns with the reference mark.
Hold the work piece down and against the fence while steadily feeding it into the blade.
Continue feeding until the work piece has cleared the blade.
Slightly more advanced cuts are rabbets, grooves and dadoes. These require removing the blade guard and splitter, so use caution when making these cuts. Use featherboards to hold the material against the tabletop and fence. Never push with your hands; use push sticks or paddles. Remember to stand clear of the cut path in case of kickback. Make a few test cuts with pieces that are the exact size of the work piece.
Rabbets are easiest to cut in two passes. The following are the steps in the first pass:
Mark the position of the rabbet on the edge and face to be cut, as well as the ends.
Set the blade height to the width of the rabbet.
Set the fence to the height of the rabbet, minus the blade's thickness.
Orient the material vertically so the edge is on the table saw and the face is against the fence–the layout marks should be towards the fence and tabletop.
Adjust featherboards to stabilize the work piece.
Feed the work piece through the blade as you would a rip cut; the blade will leave a groove in material.
In the second pass, follow these steps:
Set the blade height to the height of the rabbet.
Set the fence to the width of the rabbet, minus the blade's thickness.
Place the work piece on the table as if making a rip cut, with the layout marks towards the fence and tabletop.
Using a push stick or paddle, feed the work piece through the blade to complete the rabbet.
Grooves and dadoes are basically the same cut, except that grooves are cut with the grain and use the rip fence; dadoes are cut against the grain and use the miter gauge.
Remove the blade and throat plate, and install the dado blade and dado insert. Follow the instructions included with the dado to set the width of the cut.
Adjust the cutter height and set the fence or the miter gauge (depending on the cut).
Cut a groove using the fence as you would a rip cut; cut a dado using the miter gauge as you would a crosscut.
Remember to keep the table saw properly maintained, and always follow safety precautions when using a table saw.
Symptoms for table saws
Choose a symptom to see related table saw repairs.
Main causes: worn motor brushes, faulty drive motor, using an improper extension cord…
Main causes: lack of power, broken on/off switch, bad motor overload, broken power cord, bad drive motor…
Main causes: saw dust build up, blade elevating and tilting mechanisms need lubrication…
Main causes: blade alignment needs adjustment, worn blade, bevel positive stops need adjustments, bevel pointer needs ad…
Main causes: worn motor brushes, bad drive motor, faulty overload switch, using an improper extension cord, binding saw …
Main causes: dirty saw blade, dull or damaged saw blade, blade alignment needs adjustment…
Repair guides for table saws
These step-by-step repair guides will help you safely fix what’s broken on your table saw.
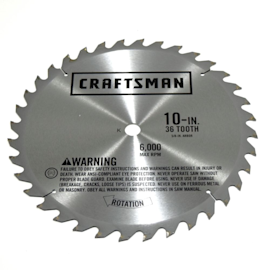
How to adjust a table saw blade
If the table saw isn’t cutting parallel to the miter gauge groove, adjust the cutting blade following the instructions i…
Repair difficulty
Time required
30 minutes or less
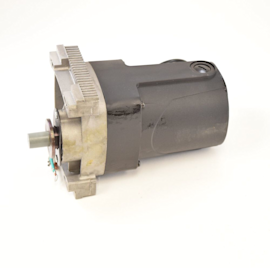
How to replace a table saw drive motor
You can replace a table saw drive motor that is weak or won't run. Here’s how.…
Repair difficulty
Time required
45 minutes or less
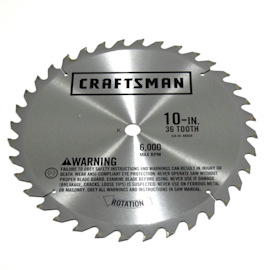
How to replace a table saw blade
If the table saw blade is dull or damaged, use these simple steps to replace it.…
Repair difficulty
Time required
15 minutes or less
Articles and videos for table saws
Use the advice and tips in these articles to get the most out of your table saw.

Learn about all the convenient features on our Sears PartsDirect website that make your parts purchases easier.…

Get answers to frequently asked questions about Sears and Sears PartsDirect.…
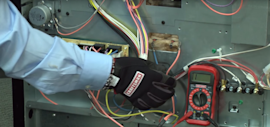
Learn how to use a multimeter to check for wiring problems in an appliance that's not working…