- Kenmore refrigerator water filters
- Whirlpool refrigerator water filters
- Samsung refrigerator water filters
- GE refrigerator water filters
- LG refrigerator water filters
- Frigidaire refrigerator water filters
- KitchenAid refrigerator water filters
- Maytag refrigerator water filters
- Kenmore Elite refrigerator water filters
- Estate refrigerator water filters
- GE Profile refrigerator water filters
- Amana refrigerator water filters
- Bosch refrigerator water filters
- Dacor refrigerator water filters
- Electrolux refrigerator water filters
How to clean and maintain your dishwasher
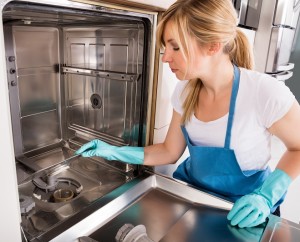

Give your dishwasher some tender loving care with a thorough cleaning. Go the extra mile and perform the maintenance steps needed to keep the dishwasher in top shape and running smoothly.
Cleaning and maintenance will help prevent unexpected breakdowns during the year and your dishwasher will last longer when it’s properly maintained.
Cleaning the dishwasher
How to clean the front panel and control panel
Follow the instructions in your owner’s manual for cleaning the control panel and front panel of the dishwasher. Most of the time, you can clean these surfaces using a cloth moistened with soapy water. Wipe the control panel and front panel with plain water to rinse off soap residue then dry the surfaces with a towel.
If you have a stainless steel dishwasher, follow the steps in our How to clean stainless steel appliances video/article to clean the front panel.
Clean out the dishwasher filters
Dishwashers typically have filters in the sump at the bottom of the dishwasher tub. Remove the bottom dishrack to access the filters.
Clear food and debris from the dishwasher filters by following the directions in the owner’s manual. If necessary, soak the filters in distilled white vinegar to remove hard water deposits. Use a soft-bristled brush to clean the deposits off the filters after soaking.
Warning: Use caution when cleaning dishwasher filters because broken glass can wind up in some filters.
After cleaning the filters, rinse them off and reinstall them in your dishwasher.
Unclog spray arm holes
Clean the spray arm holes at the same time that you clean the filters. If spray arm holes are clogged with heavy hard water deposits, you can soak the spray arms in distilled white vinegar along with the dishwasher filters.
Use bamboo skewers to clear deposits and debris fully from spray arm holes.
Repair rusted dishracks
Ugly rust spots on dishracks can be scary for your family and houseguests to see. You’ll want to fix this problem quickly so you can confidently use the dishwasher to clean dishes.
Replacing rusted dishracks is one option. It’s the easy way to fix the problem but replacing dishracks can be expensive. Check the price of new dishracks for your model before you choose this option.
The least expensive option for fixing rusty dishracks is to sand off the rust and paint the bare spots with vinyl touch-up paint. You can also cover the tops of rusted tines with plastic tine tips. The Dishwasher Tine Tip Repair Kit has the vinyl touch-up paint and the plastic tine tips to repair a white dishrack. Other colors of the repair kit are available if your rack isn't white.
Here’s our YouTube DIY video that shows how to use that kit to refurbish dishracks:
Check water temperature
The fill water for your dishwasher should be around 120 degrees. At that temperature, the detergent will dissolve properly and the hot water will melt grease off dishes easily.
Follow these steps to check the temperature of water going into your dishwasher:
Run the hot water from your kitchen sink faucet for 1 minute.
Fill a glass with hot water.
Measure the water temperature in the glass using a cooking thermometer.
If the temperature is less than 120 degrees, carefully increase the temperature setting on your water heater. Make small, incremental increases and don't set your water heater temperature above 120 degrees. That should protect you from burns in the bath or shower.
Have Sears perform professional dishwasher maintenance
The best way to keep your dishwasher cleaning properly is to schedule professional dishwasher maintenance by a Sears Technician every year. This step will also help avoid unexpected breakdowns and your dishwasher will last longer when it’s professionally maintained.
During professional dishwasher maintenance, the Sears Tech will:
Check the electronic control board and sensors. The electronic control board is the "brains" or motherboard of the dishwasher; it starts and stops all the dishwasher's functions — filling, washing, drying and draining. It receives a signal from the control panel when you select a button and displays the cycle status, time and other information on the control panel. The control board also receives signals from temperature sensors, water level sensors and water quality sensors to help control the dishwashing cycle. Electronic control board and sensors not operating properly can lead heating failures, damage to the dishwasher or dishes from overheated water/air, dishes that don’t get clean, water leaks that could damage kitchen cabinets or flooring or excess water/energy use.
Examine and clean pumps. The technician will check the wash and drain pumps for proper operation and leaks. Failure of either pump prevents dishes from getting clean during the wash cycle. Leaks from a pump can cause expensive damage to kitchen cabinets and flooring.
Test the detergent and rinse aid dispenser. Because dishes won’t get clean if the dispenser doesn’t open when it’s meant to, the technician will check for proper detergent and rinse aid dispenser operation.
Check the control panel. You may not know when an infrequently used button on your dishwasher control panel isn’t working properly. A faulty control panel button can eventually cause the dishwasher to stop operating. The service technician will check all control panel buttons for proper operation during dishwasher cleaning and maintenance.
Test the heating element. The heating element is mounted on the bottom of the dishwasher tub and heats the water during the wash and rinse portions of the cycle. Raising the water temperature improves cleaning, and in some situations, sanitation. Dishes won’t get clean and/or dry properly if the heating element fails. During this check, the technician inspects the condition and operation of the heating element.
Check and clean dishwasher door gaskets. Door gaskets, also called door seals, prevent water from leaking out of the dishwasher, possibly damaging kitchen flooring and cabinets. Your Sears technician will check for loose, damaged or dirty door gaskets.
To keep all of your appliances in top shape and save money, bundle Sears Cleaning & Maintenance so the technician can service all of your kitchen and laundry appliances in one convenient visit.
Trust Sears to help you keep all of your appliances in top shape and working smoothly
Most common symptoms to help you fix your dishwashers
Choose a symptom to see related dishwasher repairs.
Main causes: broken door spring, damaged or broken door hinge…
Main causes: not using rinse aid, rinse aid dispenser failure, broken heating element, malfunctioning vent, drying fan f…
Main causes: water supply problem, stuck overfill float, clogged water inlet valve screen, water inlet valve failure…
Main causes: light switch beside the sink turned off, lack of power, bad dishwasher door switch, control system failure,…
Main causes: improper loading, low water temperature, improper detergent dosage, detergent dispenser failure, spray arm …
Main causes: glass or popcorn kernel stuck in the chopper blade, drain line vibrating against the cabinet, debris in was…
Main causes: clogged kitchen sink drain, clogged drain hose, drain check valve damaged, drain pump failure, control syst…
Main cause: damaged rack height adjuster…
Main causes: damaged or stuck spray arm, leaking door seal, damaged door hinge, leaky heating element water seal, cracke…
Most common repair guides to help fix your dishwashers
These step-by-step repair guides will help you safely fix what’s broken on your dishwasher.

How to replace a dishwasher water inlet valve
If your dishwasher fills constantly or won't fill at all, the water inlet valve has failed. You can replace it in about …
Repair difficulty
Time required
30 minutes or less
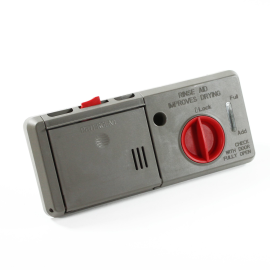
How to replace a dishwasher detergent dispenser
Dishes need dish detergent to get clean. Learn how to replace a dishwasher detergent dispenser with easy step-by-step i…
Repair difficulty
Time required
30 minutes or less
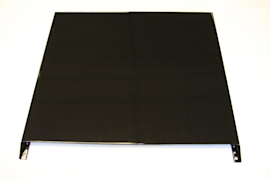
How to replace a dishwasher door outer panel
If your dishwasher door is dented or you want it to match your cabinets or other appliances, this guide shows how to rep…
Repair difficulty
Time required
15 minutes or less
Effective articles & videos to help repair your dishwashers
Use the advice and tips in these articles and videos to get the most out of your dishwasher.

Get tips on completing essential holiday cleaning tasks to brighten your home.…

Learn about all the convenient features on our Sears PartsDirect website that make your parts purchases easier.…

Get answers to frequently asked questions about Sears and Sears PartsDirect.…
