- Kenmore refrigerator water filters
- Whirlpool refrigerator water filters
- Samsung refrigerator water filters
- GE refrigerator water filters
- LG refrigerator water filters
- Frigidaire refrigerator water filters
- KitchenAid refrigerator water filters
- Maytag refrigerator water filters
- Kenmore Elite refrigerator water filters
- Estate refrigerator water filters
- GE Profile refrigerator water filters
- Amana refrigerator water filters
- Bosch refrigerator water filters
- Dacor refrigerator water filters
- Electrolux refrigerator water filters
Gas dryer won't heat troubleshooting video
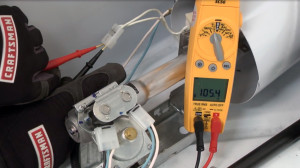

This Sears PartsDirect video shows a few easy tests you can run when your gas dryer doesn't heat, including using a multimeter to figure out which part is causing the problem. Once you’ve figured out why your gas dryer won’t heat, use our step-by-step repair videos to help get your dryer working again.
If you have an electric dryer, see our Electric dryer won’t heat troubleshooting video.
For additional repair guide and troubleshooting videos, articles and error code charts for gas and electric dryers, check out our DIY dryer repair help page.
Tools and parts needed
Phillips screwdriver
Slot screwdriver
Nut driver
Multimeter
Hi, my name is Wayne from Sears PartsDirect. Today, we're going to talk about troubleshooting a gas dryer that has no heat but runs. There are a few things that could keep your dryer from heating up. You might have a problem with the gas supply to the dryer, or problems with the flame sensor, gas valve coils, high-limit thermostat, operating thermostat, thermal cut-off fuse, thermal fuse, igniter or timer. I know that sounds like a lot, but don’t worry, we’ll help you work through it.
Check gas supply, burner igniter and coils
First, let’s make sure your gas supply line is connected, turned on and working. If the gas supply is fine, we’ll check the burner igniter next. Remove the burner sight plug from the lower left corner of the front panel. Set the timer control for a timed dry, high heat and start the dryer.
Peek through that hole to see if the igniter is glowing. If the igniter glows but the burner doesn’t light, then at least you know all the components in the control circuit are getting power. Watch the igniter for several minutes to see if it stays lit or fades off. The igniter should fade off to divert electric current through the gas valve coils to light the burner when the flame sensor detects that the igniter is hot enough.
When the flame sensor opens, electric current flows through the gas valve coils and the burner ignites. If the igniter glows constantly for 5 minutes, you'll need to replace the flame sensor because it isn't shutting off the igniter to divert current through the gas valve coils. Here’s a video on how to do that. If instead, the glow faded away after a couple of minutes, you’ll probably need to replace your gas valve coils. Here’s a video that will show you how.
Multimeter checks
Now, on the other hand, if the igniter didn’t glow at all, we’ll need to check the components in the control circuit. Checking continuity with a multimeter will allow us to test them all at once. First, unplug the dryer.
For safety, always disconnect power before checking continuity. Remove the back panel from the dryer, then remove the back of the control panel. Pull the wire harness plug with red, black and blue wires off the timer and the light blue wire from the thermal fuse. Set the multimeter to read ohms of resistance and measure continuity between the red wire and the blue spade on the thermal fuse.
If you read near 0 ohms, we know that the high-limit thermostat, operating thermostat, thermal cut-off fuse and the thermal fuse are all okay. You can skip ahead in this video and learn how to check your timer.
High-limit thermostat
If you measured no electrical continuity, which is an "OL" on this multimeter, then we’ll need to check those individual parts. We’ll check the high-limit thermostat next. Place one meter lead on each of the high-limit thermostat terminals. You should measure near 0 ohms of resistance.
If you measured no continuity, then the high-limit thermostat will need to be replaced. (The high-limit thermostat is part of the thermal cut-off fuse kit.)
Operating thermostat
If your high-limit thermostat has continuity, we’ll check the operating thermostat next. Place one meter lead on the red wire and the other on the red and white wire. You should measure near 0 ohms. If you measure no continuity, then the operating thermostat is defective. Replace it.
Thermal cut-off fuse
If your operating thermostat’s okay, we’ll move on to the thermal cut-off fuse. Put one meter lead on the red-white wire and the other on the red wire. You should measure near 0 ohms. If you measured no continuity, then you’ll need to replace the thermal cut-off fuse.
Thermal fuse and lint clogs
If your thermal cut-off fuse is okay, then we’ll move on to the thermal fuse. Put one meter lead on the red wire and the other meter lead on the light blue wire. You should measure near 0 ohms. If you measured no continuity, you’ll need to replace the thermal fuse.
Here’s something to keep in mind. More often than not, if you blew a thermal fuse, it’s because your exhaust vent is clogged with lint. Before you hook your dryer back up, check your vent and clean it out with a lint brush.
Timer
If all those components have checked out, we’ll check the timer. With the dryer still disconnected, turn the timer to timed dry, high heat. Place one meter lead on terminal "A" with the red wire and the other on terminal "C" with the black wire. If you measure near 0 ohms, then the timer is okay. If you measure no continuity, then the timer contacts are bad and the timer will need to be replaced. Here’s a video showing you how.
Igniter
If you still haven’t found the problem, then you'll need to check the igniter and flame sensor for continuity. Shut off the gas supply and remove the front panel to access these components. Pull out the lint screen. Remove the screws that secure the lint screen housing to the top panel. Release the clips and raise the top panel. Unplug the door switch from the wire harness. Remove the two screws securing the front panel to the cabinet. Tilt the front panel up and lift it out the way. Note the configuration of the belt on the idler pulley and the motor pulley before removing it.
Push the idler pulley to the right to release tension on the drive belt. Pull the drive belt off the idler pulley and the motor pulley. Pull the drum out of the dryer and set it aside. Unplug the wire harness from the igniter.
Place one meter lead on each terminal of the igniter. You should measure some resistance reading between 4 and 400 ohms through the igniter. If the igniter's open, an “OL” on the meter, replace it. Here's a video that shows you how.
Flame sensor
If the igniter's okay, check the flame sensor next. Remove one of the wires from the flame sensor. Place one meter lead on each terminal of the flame sensor. You should measure near 0 ohms of the resistance through the flame sensor. If the flame sensor's open, replace it.
If you made it all the way though and you still haven’t found out why your gas dryer is not getting hot, you could have a defective motor centrifugal switch or a wiring failure in the heating circuit. You would need a service technician to check this out for you.
Hey, thanks for watching. Check out our other repair videos here on the Sears PartsDirect YouTube channel, and if you like them, subscribe.
Most common symptoms to help you fix your dryers
Choose a symptom to see related dryer repairs.
Main causes: bad gas valve coils, broken heating element, tripped safety thermostat or fuse, bad operating thermostat, c…
Main causes: bad drum support roller, damaged idler pulley, broken blower fan blade, worn drum glide bearing, bad drive …
Main causes: damaged door strike, worn door catch…
Main causes: clogged exhaust vent, bad motor relay, loose dryer door catch, bad door switch, control system failure, fau…
Main causes: door switch failure, lack of power, broken belt, blown thermal fuse, bad drive motor, control system failur…
Main causes: clogged exhaust system, heating system failure, deposits on moisture sensor, control system failure…
Main causes: bad timer or electronic control board, door switch failure…
Main causes: lack of electrical power, bad power cord, wiring failure, bad control board, blown thermal fuse, bad door s…
Most common repair guides to help fix your dryers
These step-by-step repair guides will help you safely fix what’s broken on your dryer.
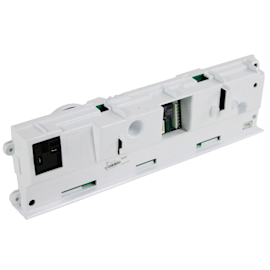
How to replace an electronic control board in an electric dryer
The electronic control board manages the components and controls the cycle times in your electric dryer. Follow these st…
Repair difficulty
Time required
45 minutes or less
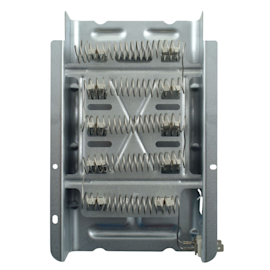
How to replace a heating element in an electric dryer
The heating element in an electric dryer generates the dryer's heat—it's one of the first things to check if the air in …
Repair difficulty
Time required
15 minutes or less
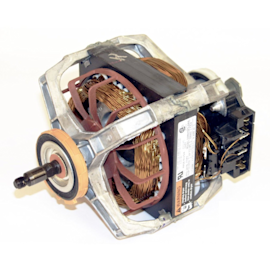
How to replace a dryer drive motor
A defective drive motor struggles to rotate the drum or might not turn the drum at all. Follow the steps in this dryer r…
Repair difficulty
Time required
90 minutes or less
Effective articles & videos to help repair your dryers
Use the advice and tips in these articles and videos to get the most out of your dryer.

Get expert tips on using your dryer efficiently to save energy.…

Learn about all the convenient features on our Sears PartsDirect website that make your parts purchases easier.…

Get answers to frequently asked questions about Sears and Sears PartsDirect.…
