- Kenmore refrigerator water filters
- Whirlpool refrigerator water filters
- Samsung refrigerator water filters
- GE refrigerator water filters
- LG refrigerator water filters
- Frigidaire refrigerator water filters
- KitchenAid refrigerator water filters
- Maytag refrigerator water filters
- Kenmore Elite refrigerator water filters
- Estate refrigerator water filters
- GE Profile refrigerator water filters
- Amana refrigerator water filters
- Bosch refrigerator water filters
- Dacor refrigerator water filters
- Electrolux refrigerator water filters
Dryer not drying clothes? Could be fabric softener!


If your dryer takes longer than usual to dry your laundry, your fabric softener might be to blame. Most people know they should remove the lint from the dryer’s lint screen or filter after every load. What they might not realize that fabric softener residue can clog the tiny holes in the screen, limiting airflow and causing longer drying times.
This video shows how to check your lint trap for fabric softener residue buildup and how to clean the residue from the screen.
If you need a replacement dryer lint screen—or another dryer part—search your model number on our Dryer replacement parts page. For more dryer troubleshooting articles and videos, repair guides and error codes, check out our DIY dryer repair help.
Hi, I’m Wayne from Sears PartsDirect. Today we have a great tip to help keep your dryer working more efficiently.
Every few months, or when you notice it takes longer for clothes to dry, wash the lint screen in your dryer. Yes, it’s important to remove lint from the screen or filter after every use, but washing regularly also can help your dryer run its best and save energy.
How to clean a dryer lint screen
Remove the lint screen from your dryer and remove lint from the screen.
To remove residue from fabric softener dryer sheets, run warm water over the lint screen while wiping with a soft-bristled brush. Some owner’s manuals also recommend using detergent or vinegar to help clean deposits off the filter.
Let the lint screen air dry completely before reinstalling it in the dryer.
Now, you might look at your dryer's lint screen when cleaning off lint and think to yourself "I don't see any fabric softener deposits. I can skip washing the screen."
Not so fast! You typically can't see the fabric softener deposits just by looking at the lint screen. Before you shove that lint screen back into the dryer, pour some water on it to see if water easily flows through the screen holes. If water seems trapped on the filter, then you'll definitely want to wash the lint screen.
Well, that’s all for today—we hope you found this video useful. You can find more DIY tips in the repair help section of our website at SearsPartsDirect.com or on the Sears PartsDirect YouTube channel. And if you need a replacement lint screen, we have those, along with many other dryer parts.
Most common symptoms to help you fix your dryers
Choose a symptom to see related dryer repairs.
Main causes: bad gas valve coils, broken heating element, tripped safety thermostat or fuse, bad operating thermostat, c…
Main causes: bad drum support roller, damaged idler pulley, broken blower fan blade, worn drum glide bearing, bad drive …
Main causes: damaged door strike, worn door catch…
Main causes: clogged exhaust vent, bad motor relay, loose dryer door catch, bad door switch, control system failure, fau…
Main causes: door switch failure, lack of power, broken belt, blown thermal fuse, bad drive motor, control system failur…
Main causes: clogged exhaust system, heating system failure, deposits on moisture sensor, control system failure…
Main causes: bad timer or electronic control board, door switch failure…
Main causes: lack of electrical power, bad power cord, wiring failure, bad control board, blown thermal fuse, bad door s…
Most common repair guides to help fix your dryers
These step-by-step repair guides will help you safely fix what’s broken on your dryer.

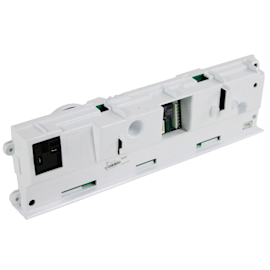
How to replace an electronic control board in an electric dryer
The electronic control board manages the components and controls the cycle times in your electric dryer. Follow these st…
Repair difficulty
Time required
45 minutes or less

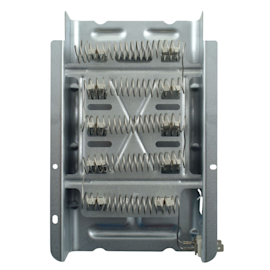
How to replace a heating element in an electric dryer
The heating element in an electric dryer generates the dryer's heat—it's one of the first things to check if the air in …
Repair difficulty
Time required
15 minutes or less

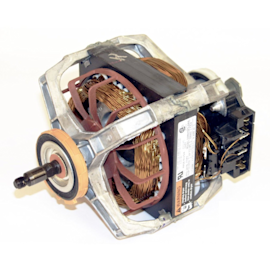
How to replace a dryer drive motor
A defective drive motor struggles to rotate the drum or might not turn the drum at all. Follow the steps in this dryer r…
Repair difficulty
Time required
90 minutes or less
Effective articles & videos to help repair your dryers
Use the advice and tips in these articles and videos to get the most out of your dryer.

Get expert tips on using your dryer efficiently to save energy.…

Learn about all the convenient features on our Sears PartsDirect website that make your parts purchases easier.…

Get answers to frequently asked questions about Sears and Sears PartsDirect.…