CONFIRM THE PART FITS
Part Information
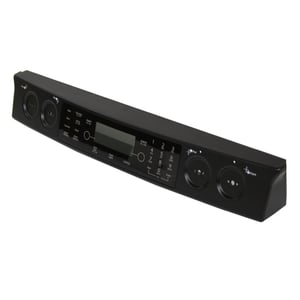
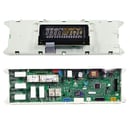
This control panel (part number WPW10206085) is for ranges.
Control panel WPW10206085 houses the selection buttons and display components for the range.
Unplug the range before installing this part. Wear work gloves to protect your hands.
Frequently Used Together
- $123.90 |9% OFF Phone Price : $135.90
- $101.25 |11% OFF Phone Price : $113.25
- $227.40 |5% OFF Phone Price : $239.40
- $344.69 |$12.00 OFF Phone Price : $356.69
- $10.89 |16% OFF Phone Price : $12.89
- $6.29 |14% OFF Phone Price : $7.29
- $21.89 |22% OFF Phone Price : $27.89
Top models using the same part
| Model Name | Model Number | Diagram Name |
|---|---|---|
| Model #JES9800CAB17 Jenn-Air electric range | JES9800CAB17 | Control panel parts |
| Model #JES9800CAF17 Jenn-Air electric range | JES9800CAF17 | Control panel parts |
| Model #JES9860BAS Jenn-Air electric range | JES9860BAS | Control panel/top assembly |
| Model #JES9860BCB Jenn-Air electric range | JES9860BCB | Control panel/top assembly |
| Model #JES9860BCW Jenn-Air electric range | JES9860BCW | Control panel/top assembly |
| Model #JES9860BAB Jenn-Air electric range | JES9860BAB | Control panel/top assembly |
| Model #JES9860BCS Jenn-Air electric range | JES9860BCS | Control panel/top assembly |
| Model #JES9800BAB Jenn-Air electric range | JES9800BAB | Control panel/top asy |
| Model #JES9860BAW Jenn-Air electric range | JES9860BAW | Control panel/top assembly |
| Model #JES9860BAB18 Jenn-Air electric range | JES9860BAB18 | Control panel parts |
Reviews
Saved a lot of Money Getting this part from Sears
I researched the problem we were having with our JennAir Downdraft Slide in Range and determined that I needed this part because the clock was still working and I could bake, broil and set the timer but was not able to operate the fan, the convection oven or setup "buttons" on the touchpad. Several YouTube videos gave me the confidence to do the job. The part itself was $50 to $100 dollars less expensive than other sellers on the internet. This in combination with with not having to pay a service call of $150-200 made me happy I did this myself.
Noel, Lowell, AR
1 person thought this review was helpful.
- Ease of Installation
- Moderate
- Duration of Installation
- 30 minutes - 1 hour
Yes, I would recommend this to a friend
Little more than lift and replace.
This is only the front display. Be prepared for the electronics behind the display. Best to have another set of hands. Remove knobs, then remove screws from knobs before face removal. Face has 2 left,right screws and 4 underneath screws (must open door for access). Be gentle when removing because of power/burner light wiring. This should be first thing removed when front panel is detached. For me, these slid to the left (standing and facing down at the panel). Push out the red, plastic power/burner indicator. Be gentle here. I broke one and had to gorilla glue it back in place and also had to use dbl-sided tape for light display. Unhook data/display ribbon cable from circuit board (same ribbon cable with new panel). Unscrew circuit board. Remove old panel. For new install, I screwed in knob controllers first, then circuit board, then ribbon, and lastly slid on power/burner lights. Checked power to display and burner lights. Slid panel in place, installed screws. Tightened all screws. Replaced knobs. Removed protective film. Done.
Banjo, N.C.
1 person thought this review was helpful.
- Ease of Installation
- Difficult
- Duration of Installation
- Less than 30 minutes
Yes, I would recommend this to a friend
