CONFIRM THE PART FITS
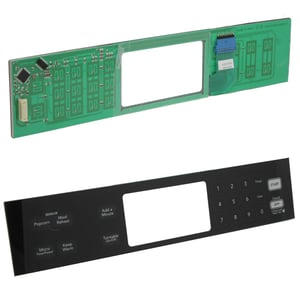
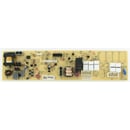
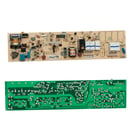
Microwave Keypad (replaces 8206635) WP8206635
Part #WP8206635
Part Information
This keypad (part number WP8206635) is for microwaves.
Keypad WP8206635 activates various settings and functions when you press one of the selection buttons.
Because high-voltage capacitors in a microwave can retain a lethal electrical charge even when the microwave is unplugged, a service technician should install this part.
Frequently Used Together
- $106.69 |10% OFF Phone Price : $118.69
- $17.06 |10% OFF Phone Price : $19.06
- $138.03 |8% OFF Phone Price : $150.03
- $15.99 |11% OFF Phone Price : $17.99
Top models using the same part
| Model Name | Model Number | Diagram Name |
|---|---|---|
| Model #KHMS2056SBL3 KitchenAid microwave/hood combo | KHMS2056SBL3 | |
| Model #KHMS2056SWH2 KitchenAid microwave/hood combo | KHMS2056SWH2 | |
| Model #KHMS2056SSS1 KitchenAid microwave/hood combo | KHMS2056SSS1 | |
| Model #KHMS2056SBL1 KitchenAid microwave/hood combo | KHMS2056SBL1 | |
| Model #KHMS2056SWH1 KitchenAid microwave/hood combo | KHMS2056SWH1 | |
| Model #KHMS2056SBL2 KitchenAid microwave/hood combo | KHMS2056SBL2 | |
| Model #KHMS2056SWH3 KitchenAid microwave/hood combo | KHMS2056SWH3 | |
| Model #KHMS2050SWH0 KitchenAid microwave/hood combo | KHMS2050SWH0 | |
| Model #KHMS2056SSS0 KitchenAid microwave/hood combo | KHMS2056SSS0 | |
| Model #KHMS2050SSS0 KitchenAid microwave/hood combo | KHMS2050SSS0 |
Reviews
Microwave Keypad
Arrived quickly. The advice in the comments was correct, the part fixed the ghost beeping.
James, Missouri
Did you find this review helpful?
- Ease of Installation
- Difficult
- Duration of Installation
- 1 - 2 hours
Don't try to take off the entire door!!
Lots of different ideas as how to change out this item on Kitchen aid KHMS2056sss2. My success was to remove the panel that holds the controls for vent fan and lights. You will probably need to remove the grease/air filter to reach the fan and light plugs as well as the wiring connected to the door. You will probably need help pulling the wiring bundle once the door panel is ready to be removed. Note there are two screw holding this side panel that can only be reached by having the door fully open. Removing this panel will give you access to the three screws on inside of door panel. There are three screws on inside and three on outside of door panel. There are also two under the door panel. Once you have all eight screws out take a putty knife and with door open push knife between the (black) inside panel and the silver outside (the one with the handle on it) once you have these two separated you can remove outer panel.Pull wiring bundle through the cutout and then you can lay it on a table to remove the cover (black plastic) to access the number/touch board. You will find it is connected to the control board all under this plastic cover. Turns out I need the control board (sort of square circuit board) and not touch board. They allowed me to return the touch panel and all is well with my microwave now.
Don M, Texas
1 person thought this review was helpful.
- Ease of Installation
- Moderate
- Duration of Installation
- 30 minutes - 1 hour
Yes, I would recommend this to a friend
