Kenmore
Tools & Attachment

Model # A5881 Official Kenmore vacuum cleaner attachment set - september, 1964

Here are the diagrams and repair parts for Official Kenmore A5881 vacuum cleaner attachment set - september, 1964, as well as links to manuals and error code tables, if available.

There are a couple of ways to find the part or diagram you need:

  • Click a diagram to see the parts shown on that diagram.
  • In the search box below, enter all or part of the part number or the part’s name.

Not all parts are shown on the diagrams—those parts are labeled NI, for “not illustrated”.

We encourage you to save the model to your profile, so it’s easy to access parts and manuals for your appliance whenever you log in.

For DIY troubleshooting advice and repair guides, visit our repair help section.

Model diagram and schematic

SEARCH WITHIN THIS MODEL

?

This is the number corresponding to the part on the diagram / schematic

Search
ALL PARTS
Showing 10 of 57 parts  |

Nut 680510
#4

Attachment parts diagram

Nut

Part #680510

The manufacturer no longer makes this part, and there's no substitute part

Nozzle 674412
#11

Attachment parts diagram

Nozzle

Part #674412

The manufacturer no longer makes this part, and there's no substitute part

Floor Brush 721456
#35

Attachment parts diagram

Floor brush

Part #721456

The manufacturer no longer makes this part, and there's no substitute part

Mounting Bearing 720940
#9

Attachment parts diagram

Mounting bearing

Part #720940

The manufacturer no longer makes this part, and there's no substitute part

Dust Pad 721289
#52

Attachment parts diagram

Dust pad

Part #721289

The manufacturer no longer makes this part, and there's no substitute part

Wand Assembly 721462
#33

Attachment parts diagram

Wand assembly

Part #721462

The manufacturer no longer makes this part, and there's no substitute part

Insert 667703
#40

Attachment parts diagram

Insert

Part #667703

The manufacturer no longer makes this part, and there's no substitute part

Crevice Tool 721088
#47

Attachment parts diagram

Crevice tool

Part #721088

The manufacturer no longer makes this part, and there's no substitute part

Cord Plug 720942
#28

Attachment parts diagram

Cord plug

Part #720942

The manufacturer no longer makes this part, and there's no substitute part

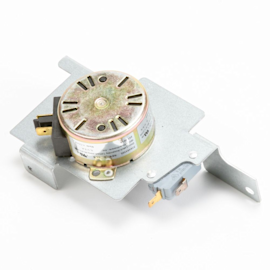
Motor 700273
#34

Attachment parts diagram

Motor

Part #700273

The manufacturer no longer makes this part, and there's no substitute part

Most common symptoms to help you fix your dryers

Choose a symptom to see related dryer repairs.

Main causes: bad gas valve coils, broken heating element, tripped safety thermostat or fuse, bad operating thermostat, c…

Main causes: bad drum support roller, damaged idler pulley, broken blower fan blade, worn drum glide bearing, bad drive …

Main causes: damaged door strike, worn door catch…

Main causes: clogged exhaust vent, bad motor relay, loose dryer door catch, bad door switch, control system failure, fau…

Main causes: door switch failure, lack of power, broken belt, blown thermal fuse, bad drive motor, control system failur…

Main causes: clogged exhaust system, heating system failure, deposits on moisture sensor, control system failure…

Main causes: bad timer or electronic control board, door switch failure…

Main causes: lack of electrical power, bad power cord, wiring failure, bad control board, blown thermal fuse, bad door s…

Most common repair guides to help fix your dryers

These step-by-step repair guides will help you safely fix what’s broken on your dryer.

How to replace an electronic control board in an electric dryer

How to replace an electronic control board in an electric dryer

The electronic control board manages the components and controls the cycle times in your electric dryer. Follow these st…

Repair difficulty
Time required
 45 minutes or less
How to replace a heating element in an electric dryer

How to replace a heating element in an electric dryer

The heating element in an electric dryer generates the dryer's heat—it's one of the first things to check if the air in …

Repair difficulty
Time required
 15 minutes or less
How to replace a dryer drive motor

How to replace a dryer drive motor

A defective drive motor struggles to rotate the drum or might not turn the drum at all. Follow the steps in this dryer r…

Repair difficulty
Time required
 90 minutes or less

Effective articles & videos to help repair your dryers

Use the advice and tips in these articles and videos to get the most out of your dryer.

How to use your clothes dryer efficiently

How to use your clothes dryer efficiently

Get expert tips on using your dryer efficiently to save energy.…

How to enjoy all the online benefits we offer on our Sears PartsDirect website

How to enjoy all the online benefits we offer on our Sears PartsDirect website

Learn about all the convenient features on our Sears PartsDirect website that make your parts purchases easier.…

Top questions about Sears and Sears PartsDirect

Top questions about Sears and Sears PartsDirect

Get answers to frequently asked questions about Sears and Sears PartsDirect.…