5 secrets for getting great stand mixer results
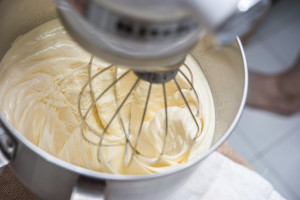

Hands-free mixing, fewer messes and faster results make the stand mixer a versatile kitchen appliance, so it’s important to treat it right.
Here are 5 easy tips and techniques to help you get the most out of your stand mixer.
Plus, check out Sears PartsDirect's DIY stand mixer repair guides to find troubleshooting advice, repair guides and common questions and answers to stand mixer questions.
Beater-to-bowl clearance
The correct beater-to-bowl clearance means better mixing and less stopping to scrape. The bottom of your beater shouldn’t hit the mixing bowl, but it shouldn’t be too far away either. Most adjustments are pretty simple: unplug the mixer, tilt the motor head back and lock it, and turn the screw as needed to adjust the beater. You’ll find complete instructions in your owner’s manual.
What speed should I use?
Your stand mixer has different speeds for a reason. With any mixture, start with a slow speed—unless you like having that cake batter splatter in your face or on your clothes. It’s also important to remember that your mixer may not maintain fast speeds with a heavy load. This slowing is normal, so no need to panic and think your mixer is on its last legs.
Certain speeds are better for different types of mixing, however. Here’s a general guide for a 10-speed Kenmore stand mixer:
1/Stir. For slow stirring, combining, mashing and starting all mixing. Use to add flour and dry ingredients to batter, add liquid to dry ingredients and combine heavy mixtures.
2/Slow Mixing. For slow mixing, mashing, faster stirring. Use to mix heavy batters and candies, start mashing potatoes or other vegetables, cut shortening into flour, mix thin or splashing batters, and mix and knead yeast dough.
4/Mixing or Beating. For mixing semi-heavy batter, such as cookies. Use to combine sugar and shortening and to add sugar to egg whites for meringues. Use this medium speed for cake mixes.
6/Beating or Creaming. For medium-fast beating (creaming) or whipping. Use to finish mixing cake, doughnut and other batters. High speed for cake mixes.
8/Fast Beating or Whipping. For whipping cream, egg whites and boiled frostings.
10/Fast Whipping. For whipping small amounts of cream or egg whites.
Scraping while mixing
Just don’t do it. Turn off the mixer before you scrape the bowl even if the recipe says to scrape continuously while beating the mixture. Stopping the mixer first prevents the scraper from getting caught in the beater and possibly twisting the scraper out of shape. Also, no one likes to taste little pieces of scraper in their cake or cookies.
Find mixer replacements parts at SearsPartsDirect.com.
Care and cleaning
Always unplug your stand mixer before cleaning. Don’t immerse the mixer in water. Clean the exterior with a soft, damp cloth. Remember to wipe off residue from the beater shaft. Don’t use abrasive cleaners or scouring pads when cleaning your stand mixer.
You can wash the mixing bowl and beaters for most stand mixers in your dishwasher. Or wash them by hand in hot, sudsy water and rinse completely before drying. Some attachments should only be washed by hand. Check your owner’s manual for washing instructions for your mixer.
Don’t store the beaters on the shaft.
Read your owner’s manual
We’ve already mentioned the owner’s manual several times, so we hope you’ve gotten the hint. Read it thoroughly. Before using your stand mixer. It has a lot of good advice on use and care of your mixer, troubleshooting problems, mixing tips and how to use attachments. Show your mixer a little TLC and you’ll be baking culinary delights for your family for years to come.
Most common symptoms to help you fix your stand mixers
Choose a symptom to see related stand mixer repairs.
Main causes: bad wiring connections, faulty speed control plate, electronic control board failure…
Main causes: phase control board failure, wiring connection problem, faulty electronic control board…
Main causes: bad lubricating grease, mixer sitting idle for weeks at a time, mixer running constantly for more than 30 m…
Main cause: worn carbon motor brushes…
Main causes: bad worm gear, damaged planetary gear assembly…
Main cause: attachment clearance setting needs adjustment…
Main causes: lack of electrical power, wiring failure, worn carbon motor brushes, bad drive motor, tripped overload swit…
Most common repair guides to help fix your stand mixers
These step-by-step repair guides will help you safely fix what’s broken on your stand mixer.

How to replace a stand mixer worm gear
Here’s how to replace the worm gear in your stand mixer if it’s worn or damaged.…
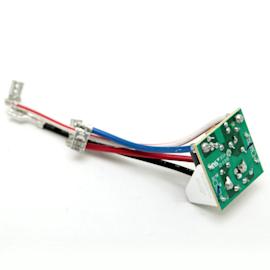
How to replace a stand mixer phase control board
The phase control board works with the governor and control plate to control motor speed. Replace the phase control boar…
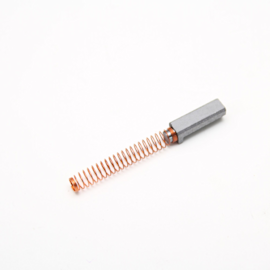
How to replace stand mixer motor brushes
If the carbon brushes are worn and damaged, replace them using these steps.…
Effective articles & videos to help repair your stand mixers
Use the advice and tips in these articles and videos to get the most out of your stand mixer.

Learn about all the convenient features on our Sears PartsDirect website that make your parts purchases easier.…

Learn some of the most common symbols found in a wiring diagram and what they mean.…
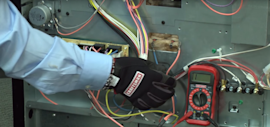
Learn how to use a multimeter to check for wiring problems in an appliance that's not working…